

The Gougeon Brothers on Boat Construction - WEST SYSTEM Epoxy
The Gougeon Brothers on Boat Construction - WEST SYSTEM Epoxy
The Gougeon Brothers on Boat Construction - WEST SYSTEM Epoxy

Create successful ePaper yourself
Turn your PDF publications into a flip-book with our unique Google optimized e-Paper software.
Chapter 21 – Laminating Veneer Over a Mold or Plug 235<br />
<strong>on</strong> them are potentially endless, we have been able to<br />
find <strong>on</strong>ly <strong>on</strong>e effective staple removing tool, a model<br />
designed for upholsterers manufactured by the Stanley<br />
Tool Company. A good tool should have a very sharp,<br />
hardened steel point which inserts easily under the<br />
crown of a staple, and it should have a fulcrum<br />
immediately aft of this point which is wide enough<br />
to prevent damage to the wood. You should be able<br />
to rock the handle to extract the staple with minimal<br />
effort. Figure 21-8 shows some of the tools we have<br />
built in the shop with these design criteria in mind.<br />
You can modify a large screwdriver by grinding its end<br />
to a sharp wide edge and by grinding a curve <strong>on</strong> <strong>on</strong>e<br />
side so that there is some rocker <strong>on</strong> the side opposite<br />
the edge. If, after grinding, you find that your fulcrum<br />
is too small, try bending the screwdriver slightly. A<br />
well-hardened screwdriver may not permit this, in<br />
which case you can b<strong>on</strong>d a piece of wood or add<br />
thickened epoxy to build up the fulcrum. Your staple<br />
remover will receive a lot of use, so it’s worth the time<br />
it takes to make a good tool that works easily and well.<br />
Applying the First Layer of Veneer<br />
<str<strong>on</strong>g>The</str<strong>on</strong>g> first layer will become the interior of your boat, so<br />
select its veneers with great care and present the finest<br />
grain and color you have. We almost always naturally<br />
finish interiors because they are beautiful and practical<br />
when d<strong>on</strong>e this way.<br />
Begin by placing a master veneer in the middle of the<br />
mold. If you start here, you can plank toward the stem<br />
and toward the transom simultaneously. If two people<br />
or teams are available, they can work in opposite directi<strong>on</strong>s.<br />
Because your angle is in the middle of the hull,<br />
it’s easier to maintain as you apply veneers. <str<strong>on</strong>g>The</str<strong>on</strong>g>re is no<br />
set rule for the angle of the first layer, but 45° is good<br />
for starters.<br />
Mark the angle of the first veneer <strong>on</strong> the polyethylene<br />
mold cover. Set your sliding bevel at the desired angle,<br />
place it <strong>on</strong> top of a level, and positi<strong>on</strong> both tools next<br />
to the hull. Move the level until its bubble is centered<br />
in its markings and transfer the angle from the bevel<br />
square to the mold. Make a mark just l<strong>on</strong>g enough to<br />
indicate the placement of the first veneer. <str<strong>on</strong>g>The</str<strong>on</strong>g>n hold<br />
the veneer <strong>on</strong> the mold and draw a line all the way<br />
across the mold surface to show its exact positi<strong>on</strong>.<br />
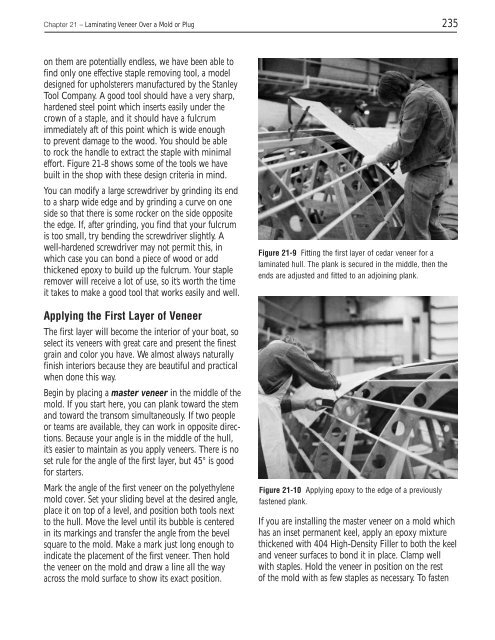
Figure 21-9 Fitting the first layer of cedar veneer for a<br />
laminated hull. <str<strong>on</strong>g>The</str<strong>on</strong>g> plank is secured in the middle, then the<br />
ends are adjusted and fitted to an adjoining plank.<br />
Figure 21-10 Applying epoxy to the edge of a previously<br />
fastened plank.<br />
If you are installing the master veneer <strong>on</strong> a mold which<br />
has an inset permanent keel, apply an epoxy mixture<br />
thickened with 404 High-Density Filler to both the keel<br />
and veneer surfaces to b<strong>on</strong>d it in place. Clamp well<br />
with staples. Hold the veneer in positi<strong>on</strong> <strong>on</strong> the rest<br />
of the mold with as few staples as necessary. To fasten


