

The Gougeon Brothers on Boat Construction - WEST SYSTEM Epoxy
The Gougeon Brothers on Boat Construction - WEST SYSTEM Epoxy
The Gougeon Brothers on Boat Construction - WEST SYSTEM Epoxy

Create successful ePaper yourself
Turn your PDF publications into a flip-book with our unique Google optimized e-Paper software.
204 First Producti<strong>on</strong> Steps<br />
To detect twist, hold the spirit level in a vertical positi<strong>on</strong><br />
in various locati<strong>on</strong>s <strong>on</strong> the stati<strong>on</strong> face. If you have<br />
applied the legs precisely parallel to the centerline, you<br />
can use the legs as the arbitrarily chosen points to be<br />
made plumb. To eliminate twist, you usually need to<br />
adjust the diag<strong>on</strong>al or to install a sec<strong>on</strong>d, and sometimes<br />
even a third, diag<strong>on</strong>al.<br />
If the set-up is <strong>on</strong> a floor, you can use wooden wedges,<br />
tapped under the legs with a mallet or manually, for<br />
minute increments of vertical adjustment. If the set-up<br />
is <strong>on</strong> a str<strong>on</strong>gback, you can make these adjustments in<br />
the clamping of the legs to the anchoring blocks. Vertical<br />
adjustment usually necessitates adjustment of the<br />
diag<strong>on</strong>al(s) to bring the stati<strong>on</strong> back to plumb and the<br />
taking up or letting out of line to the plumb bob. Keep<br />
working until the stati<strong>on</strong> positi<strong>on</strong> is accurate. One<br />
adjustment may necessitate others.<br />
If you are using the two-level method instead of a plumb<br />
bob, you will need a sec<strong>on</strong>d spirit level. Clamp this<br />
horiz<strong>on</strong>tally al<strong>on</strong>g the spall. <str<strong>on</strong>g>The</str<strong>on</strong>g> straightness of the spall<br />
edge is obviously very important. With the two-level<br />
method, bringing the bubble of the sec<strong>on</strong>d level into the<br />
reticles takes the place of bringing the plumb line over<br />
the stati<strong>on</strong>’s centerline. Bringing the straightedge to the<br />
cable then performs the functi<strong>on</strong> of aligning the centerline<br />
<strong>on</strong>to the cable. <str<strong>on</strong>g>The</str<strong>on</strong>g> other level is used as before.<br />
Orient the level that is clamped to the spall in the same<br />
directi<strong>on</strong> <strong>on</strong> all the frames. In other words, if the frames<br />
are being set up in a north-south directi<strong>on</strong> athwartship,<br />
mark <strong>on</strong>e end of the level “N” or “S” and always<br />
positi<strong>on</strong> it accordingly. In this way, any error in the<br />
level will always be in the same directi<strong>on</strong> and the result<br />
will be that all of the stati<strong>on</strong> centerlines, though they<br />
may not be perfectly vertical, will at least be in the<br />
same plane, which is all that really matters.<br />
Before applying any filleting, it is a good idea to go to<br />
the lofting floor and measure and make notes <strong>on</strong> the<br />
distances for each stati<strong>on</strong> of the cable to sheer and the<br />
cable to the top of the mold frame. After a stati<strong>on</strong> is in<br />
positi<strong>on</strong>, check the measurements in the set-up before<br />
applying the filleting. <str<strong>on</strong>g>The</str<strong>on</strong>g> check is good for revealing<br />
any gross errors in manufacturing or setting up the<br />
frame. Such errors would reveal themselves rather so<strong>on</strong><br />
in any case, but it is better to discover them before it<br />
becomes necessary to chisel away the filleting material<br />
in order to correct them.<br />
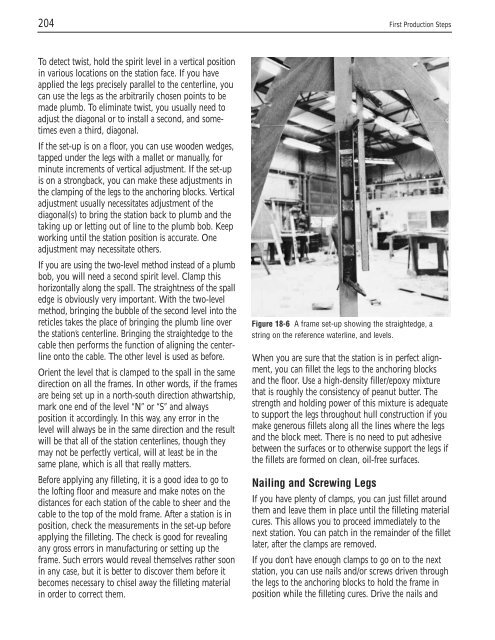
Figure 18-6 A frame set-up showing the straightedge, a<br />
string <strong>on</strong> the reference waterline, and levels.<br />
When you are sure that the stati<strong>on</strong> is in perfect alignment,<br />
you can fillet the legs to the anchoring blocks<br />
and the floor. Use a high-density filler/epoxy mixture<br />
that is roughly the c<strong>on</strong>sistency of peanut butter. <str<strong>on</strong>g>The</str<strong>on</strong>g><br />
strength and holding power of this mixture is adequate<br />
to support the legs throughout hull c<strong>on</strong>structi<strong>on</strong> if you<br />
make generous fillets al<strong>on</strong>g all the lines where the legs<br />
and the block meet. <str<strong>on</strong>g>The</str<strong>on</strong>g>re is no need to put adhesive<br />
between the surfaces or to otherwise support the legs if<br />
the fillets are formed <strong>on</strong> clean, oil-free surfaces.<br />
Nailing and Screwing Legs<br />
If you have plenty of clamps, you can just fillet around<br />
them and leave them in place until the filleting material<br />
cures. This allows you to proceed immediately to the<br />
next stati<strong>on</strong>. You can patch in the remainder of the fillet<br />
later, after the clamps are removed.<br />
If you d<strong>on</strong>’t have enough clamps to go <strong>on</strong> to the next<br />
stati<strong>on</strong>, you can use nails and/or screws driven through<br />
the legs to the anchoring blocks to hold the frame in<br />
positi<strong>on</strong> while the filleting cures. Drive the nails and


