

The Gougeon Brothers on Boat Construction - WEST SYSTEM Epoxy
The Gougeon Brothers on Boat Construction - WEST SYSTEM Epoxy
The Gougeon Brothers on Boat Construction - WEST SYSTEM Epoxy

You also want an ePaper? Increase the reach of your titles
YUMPU automatically turns print PDFs into web optimized ePapers that Google loves.
Chapter 14 – Hardware B<strong>on</strong>ding 147<br />
When you have drilled all of the holes, positi<strong>on</strong> the<br />
keel bolt pattern <strong>on</strong> both the inside and outside of the<br />
hull over the drilled holes to check them for accuracy.<br />
<str<strong>on</strong>g>The</str<strong>on</strong>g> holes will usually line up very accurately from the<br />
side that you started drilling from, but the opposite<br />
side of the hull may show some inaccuracy caused by<br />
improper lineup or wandering of the drill bit. Carefully<br />
mark these errors and then use a round wood rasp to<br />
move the dimensi<strong>on</strong> of the hole toward the directi<strong>on</strong><br />
needed to straighten it out with the pattern. Usually,<br />
this situati<strong>on</strong> causes no harm, <strong>on</strong>ly a slightly enlarged<br />
hole which has the positive effect of increasing surface<br />
area. <str<strong>on</strong>g>The</str<strong>on</strong>g> <strong>on</strong>ly disadvantage is the possible weakening<br />
of the laminated floor itself. However, this should be a<br />
minor problem in most situati<strong>on</strong>s. Make a final, careful<br />
check with the keel bolt pattern to assure yourself that<br />
the drilled holes in the hull will indeed receive the bolts<br />
protruding from the ballast keel with no interference<br />
from the wood itself. <str<strong>on</strong>g>The</str<strong>on</strong>g>n you can begin final preparati<strong>on</strong>s<br />
for a ballast keel/hull uni<strong>on</strong>.<br />
Usually, this is the last major job <strong>on</strong> a boat, and you can<br />
do it just before launching. Up to the time you install<br />
the keel, you will probably want the hull close to the<br />
floor for easy access. To install the keel, however, you<br />
will have to jack the hull up high enough to have room<br />
to roll the keel and its bolts into positi<strong>on</strong>. When the<br />
keel is in rough positi<strong>on</strong>, move it as necessary until you<br />
can lower the hull <strong>on</strong>to it.<br />
When you have lined up the keel bolts with the bolt<br />
holes, you can set the hull down over the top of the<br />
Figure 14-23 A keel set up in a specially-built handling fixture<br />
so it can be final faired and moved around.<br />
bolts, leaving a gap of about 2" or 3" (50 or 75mm)<br />
between hull and keel. At this point, you can take final<br />
measurements to note any possible discrepancies<br />
between the mating surfaces of the keel and hull.<br />
Check the keel bolts visually to make sure that there<br />
are no hang-ups that could prevent the hull from seating<br />
flush with the keel’s mating surface.<br />
Coat areas of the mating surface <strong>on</strong> the bottom of the<br />
hull from the foremost keel bolt forward and from the<br />
aftermost keel bolt aft with a parting agent to prevent<br />
epoxy from b<strong>on</strong>ding in these areas. <str<strong>on</strong>g>The</str<strong>on</strong>g> reas<strong>on</strong> for this<br />
is that the ballast keel is a rigid, n<strong>on</strong>-flexing mass, while<br />
the wood hull structure is not. Invariably, over a period<br />
of time, movement will take place between parts of the<br />
keel and hull. It will occur just bey<strong>on</strong>d the outermost<br />
keel bolts, both fore and aft, creating small, hairline<br />
cracks. If you b<strong>on</strong>d the keel with epoxy to the hull,<br />
these cracks will occur within the wood structure itself,<br />
providing points of moisture entry into the wood fiber.<br />
<str<strong>on</strong>g>The</str<strong>on</strong>g> parting agent causes the cracks to occur between<br />
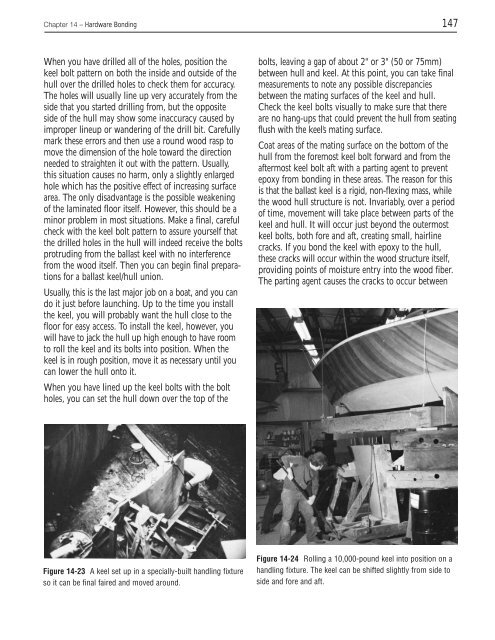
Figure 14-24 Rolling a 10,000-pound keel into positi<strong>on</strong> <strong>on</strong> a<br />
handling fixture. <str<strong>on</strong>g>The</str<strong>on</strong>g> keel can be shifted slightly from side to<br />
side and fore and aft.


