

The Gougeon Brothers on Boat Construction - WEST SYSTEM Epoxy
The Gougeon Brothers on Boat Construction - WEST SYSTEM Epoxy
The Gougeon Brothers on Boat Construction - WEST SYSTEM Epoxy

Create successful ePaper yourself
Turn your PDF publications into a flip-book with our unique Google optimized e-Paper software.
Chapter 23 – Strip Plank Laminated Veneer and Strip Composite C<strong>on</strong>structi<strong>on</strong> 267<br />
or cross the sheer at an angle. Without hand spiling, it’s<br />
very difficult to finish planking with strips running<br />
exactly parallel to the sheer line. We usually install<br />
permanent sheer clamps, although doing this means<br />
that we often have to saw temporary frames in order to<br />
remove them. This is <strong>on</strong>ly a problem if we want to use<br />
the frames for another boat.<br />
Precoat and sand exposed interior areas of the permanent<br />
sheer clamp, keel, stem, transom, bulkheads, and<br />
other permanent interior items before installing them in<br />
the set-up. Protect all prefinished permanent members<br />
by covering them with duct tape or other heavy-duty<br />
tape, which will prevent damage from both dripping<br />
epoxy and sanding.<br />
When you have installed all of the permanent members<br />
in the set-up and completed final fairing of both temporary<br />
frames and permanent members, the set-up is<br />
ready for strip planking. During this procedure, you<br />
should attach the planking permanently to all permanent<br />
members but avoid any possibility of accidentally<br />
b<strong>on</strong>ding the planking to the temporary mold frames.<br />
Cover the edges of all temporary frames carefully with<br />
strips of 4-mil or 6-mil polyethylene sheet, stapling the<br />
plastic several inches back from the edges <strong>on</strong> both sides<br />
of the frame. When you have completed this, you are<br />
ready to begin strip planking.<br />
Stock for Strip Planking<br />
Choose the most practical planking size for your<br />
project. Most boats will require strip planks between 1 ⁄2"<br />
and 1" (12mm and 25mm) thick. Determine the<br />
planking size for your hull after c<strong>on</strong>sidering the<br />
following:<br />
1. <str<strong>on</strong>g>The</str<strong>on</strong>g> size and width of the boat.<br />
2. <str<strong>on</strong>g>The</str<strong>on</strong>g> spacing between permanent or temporary frames<br />
in the set-up.<br />
3. Whether the chosen thickness of planking can bend<br />
around the most severe curves in the hull.<br />
4. <str<strong>on</strong>g>The</str<strong>on</strong>g> most efficient use of available dimensi<strong>on</strong>al<br />
lumber.<br />
Planking width is governed by two factors. First is the<br />
need to attach <strong>on</strong>e plank to the next with dowels or<br />
nails in the process of edge nailing. This is somewhat<br />
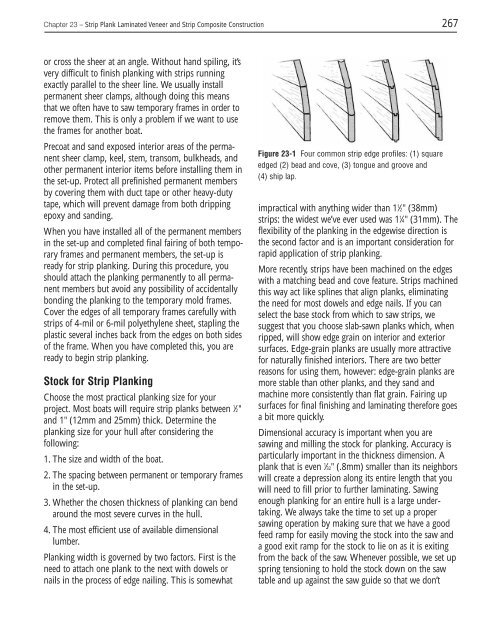
Figure 23-1 Four comm<strong>on</strong> strip edge profiles: (1) square<br />
edged (2) bead and cove, (3) t<strong>on</strong>gue and groove and<br />
(4) ship lap.<br />
impractical with anything wider than 11 ⁄2" (38mm)<br />
strips: the widest we’ve ever used was 11 ⁄4" (31mm). <str<strong>on</strong>g>The</str<strong>on</strong>g><br />
flexibility of the planking in the edgewise directi<strong>on</strong> is<br />
the sec<strong>on</strong>d factor and is an important c<strong>on</strong>siderati<strong>on</strong> for<br />
rapid applicati<strong>on</strong> of strip planking.<br />
More recently, strips have been machined <strong>on</strong> the edges<br />
with a matching bead and cove feature. Strips machined<br />
this way act like splines that align planks, eliminating<br />
the need for most dowels and edge nails. If you can<br />
select the base stock from which to saw strips, we<br />
suggest that you choose slab-sawn planks which, when<br />
ripped, will show edge grain <strong>on</strong> interior and exterior<br />
surfaces. Edge-grain planks are usually more attractive<br />
for naturally finished interiors. <str<strong>on</strong>g>The</str<strong>on</strong>g>re are two better<br />
reas<strong>on</strong>s for using them, however: edge-grain planks are<br />
more stable than other planks, and they sand and<br />
machine more c<strong>on</strong>sistently than flat grain. Fairing up<br />
surfaces for final finishing and laminating therefore goes<br />
a bit more quickly.<br />
Dimensi<strong>on</strong>al accuracy is important when you are<br />
sawing and milling the stock for planking. Accuracy is<br />
particularly important in the thickness dimensi<strong>on</strong>. A<br />
plank that is even 1 ⁄32" (.8mm) smaller than its neighbors<br />
will create a depressi<strong>on</strong> al<strong>on</strong>g its entire length that you<br />
will need to fill prior to further laminating. Sawing<br />
enough planking for an entire hull is a large undertaking.<br />
We always take the time to set up a proper<br />
sawing operati<strong>on</strong> by making sure that we have a good<br />
feed ramp for easily moving the stock into the saw and<br />
a good exit ramp for the stock to lie <strong>on</strong> as it is exiting<br />
from the back of the saw. Whenever possible, we set up<br />
spring tensi<strong>on</strong>ing to hold the stock down <strong>on</strong> the saw<br />
table and up against the saw guide so that we d<strong>on</strong>’t


