

SIREC D Display Recorder 7ND4000
SIREC D Display Recorder 7ND4000
SIREC D Display Recorder 7ND4000

Sie wollen auch ein ePaper? Erhöhen Sie die Reichweite Ihrer Titel.
YUMPU macht aus Druck-PDFs automatisch weboptimierte ePaper, die Google liebt.
B. Setting a Search Reference - Before<br />
you begin a search, you have to decide which PEN<br />
or point you are going to use as the search<br />
reference, and which direction you wish to search<br />
in. Use the PEN button to select the pen trace to<br />
search. Each time this button is pressed, the next<br />
pen is selected. The current pen is shown in the<br />
status line at the top of the screen, together with<br />
the value of the trace under the cursor and its<br />
actual time and date stamp.<br />
C. Setting a Search Direction - The search<br />
direction is determined by the button to the left of<br />
the PEN button. This button toggles between<br />
BACK and FWD. BACK will search BACKWARDS<br />
in time from the current cursor position (into older<br />
data), while FWD will search FORWARDS in time<br />
from the current cursor position (into newer data).<br />
D. Initiating the Search - To initiate a search<br />
press either the FIND> button to find the first point<br />
GREATER than the search value, or FIND< to find<br />
the first point LESS than the current search value.<br />
Each time either of these buttons is pressed, the<br />
next point that meets the search criteria is found.<br />
Note that once a point is found, the next point to be<br />
found will be the one that is after the first point that<br />
does not meet the criteria. The search “hops”<br />
across all other values so that you are not bogged<br />
down finding useless information. Therefore if you<br />
are searching for a point on a sine wave, for<br />
example, you will find the same point on the same<br />
phase of the wave (360° apart). Otherwise you<br />
would find every point less than or greater than the<br />
search point which could be every point in the<br />
trend.<br />
E. Search Results - The point that meets the<br />
search criteria will be placed under the cursor near<br />
the center of the screen. The search may take<br />
some time, especially if searching a large disk file.<br />
If no point is found the unit will display “No Point<br />
Found”. The user can continue to search for other<br />
points in the same direction or change direction<br />
and search again. Once an acceptable point is<br />
found, the user can enter the interactive browse<br />
mode by first pressing the EXIT button to return to<br />
the Browse mode button bar (Fig 3-20 above), and<br />
then pressing the BROWS button.<br />
Siemens AG C79000-G7374-C211-01<br />
<strong>SIREC</strong> D Manual<br />
Operation<br />
3.4.5 INTERACTIVE BROWSE. The<br />
interactive browse mode enables the user to<br />
uniquely identify points on the screen by time, date<br />
and value, and move around in time.<br />
A. Entering Interactive Browse Mode -<br />
Once the Browse source has been selected, FILE<br />
or RAM, pressing the BROWS button again,<br />
immediately or after a search or compress<br />
operation, will enter the Interactive Browse mode,<br />
and the Browse Button Bar shown in Fig 3-22<br />
below will appear.<br />
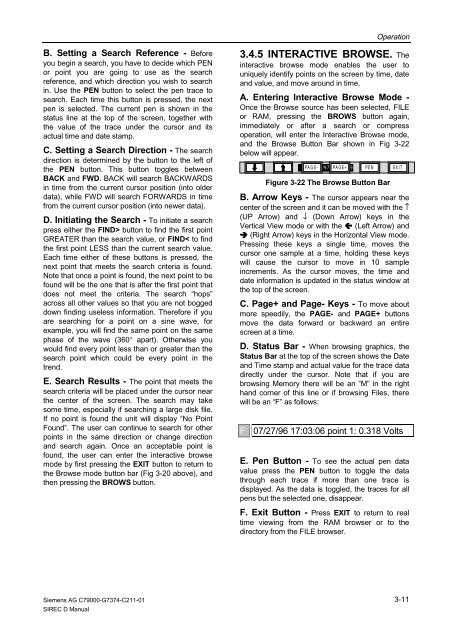
PA04/16/97 G E- PA4:59:29 G E + PE N<br />
EX I T<br />
Figure 3-22 The Browse Button Bar<br />
B. Arrow Keys - The cursor appears near the<br />
center of the screen and it can be moved with the ↑<br />
(UP Arrow) and ↓ (Down Arrow) keys in the<br />
Vertical View mode or with the �� (Left Arrow) and<br />
�� (Right Arrow) keys in the Horizontal View mode.<br />
Pressing these keys a single time, moves the<br />
cursor one sample at a time, holding these keys<br />
will cause the cursor to move in 10 sample<br />
increments. As the cursor moves, the time and<br />
date information is updated in the status window at<br />
the top of the screen.<br />
C. Page+ and Page- Keys - To move about<br />
more speedily, the PAGE- and PAGE+ buttons<br />
move the data forward or backward an entire<br />
screen at a time.<br />
D. Status Bar - When browsing graphics, the<br />
Status Bar at the top of the screen shows the Date<br />
and Time stamp and actual value for the trace data<br />
directly under the cursor. Note that if you are<br />
browsing Memory there will be an “M” in the right<br />
hand corner of this line or if browsing Files, there<br />
will be an “F” as follows:<br />
F 07/27/96 17:03:06 point 1: 0.318 Volts<br />
E. Pen Button - To see the actual pen data<br />
value press the PEN button to toggle the data<br />
through each trace if more than one trace is<br />
displayed. As the data is toggled, the traces for all<br />
pens but the selected one, disappear.<br />
F. Exit Button - Press EXIT to return to real<br />
time viewing from the RAM browser or to the<br />
directory from the FILE browser.<br />
3-11


