

SIREC D Display Recorder 7ND4000
SIREC D Display Recorder 7ND4000
SIREC D Display Recorder 7ND4000

Sie wollen auch ein ePaper? Erhöhen Sie die Reichweite Ihrer Titel.
YUMPU macht aus Druck-PDFs automatisch weboptimierte ePaper, die Google liebt.
Programming<br />
C. Alarm Deadband - An Alarm Deadband can<br />
be set for each point. The alarm Deadband is also<br />
called hysteresis and is an amount added or<br />
subtracted (depending whether the alarm is low or<br />
high) to the actual set point to determine the reset<br />
point. It is primarily intended to reject noise about a<br />
set point. For example, if a high alarm set point is at<br />
50, and the deadband is set at 5, the alarm will<br />
trigger when the input exceeds 50 but will not clear<br />
(reset) until the input reaches 45 (Set point minus<br />
hysteresis).<br />
1. Programming Alarm Deadband - At the<br />
"Alarms" prompt in the Point Setup Menu, press<br />
ENTER. The display will show the Alarms Setup<br />
Menu.<br />
2. Use the UP (↑) or DOWN (↓) Arrow Keys to<br />
scroll through the menu items in the Alarms Setup<br />
Menu and highlight "alm deadband". Press<br />
ENTER and the display reads "db�XX…XX�".<br />
3. Use the numeric keypad to enter the desired<br />
deadband in absolute engineering units. Press<br />
ENTER and the display returns to the "Alm deadband"<br />
option in the Alarms Setup Menu.<br />
D. Alarm Delay - An Alarm Delay can be set for<br />
each point. This delay prevents the alarms from<br />
activating until the set time has elapsed from an<br />
alarm active condition. If the alarm condition goes<br />
away before the delay is up, the alarm will not<br />
respond. The delay retriggers. If the alarm condition<br />
goes away before the delay is up and then return,<br />
the delay is reset and the full delay period will expire<br />
before the alarm becomes active. This feature can<br />
be used to overcome spurious or transient alarm<br />
conditions.<br />
1. Programming Alarm Delay - At the "Alarms"<br />
prompt in the Point Setup Menu, press ENTER.<br />
The display will show the Alarms Setup Menu.<br />
Use the UP (↑) or DOWN (↓) Arrow Keys to scroll<br />
through the menu items in the Alarms Setup Menu<br />
and highlight "alm delay". Press ENTER and the<br />
display reads "seconds�XX...XX�".<br />
2. Use the numeric keypad to enter the desired<br />
delay up to a maximum of 600 seconds (ten minutes).<br />
Press ENTER and the display returns to the<br />
"Alm delay" option in the Alarms Setup Menu.<br />
4-44<br />
4.7 RECORD SETUP<br />
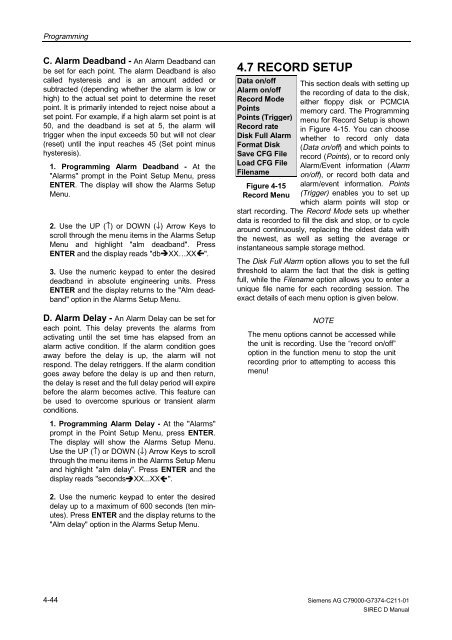
Data on/off<br />
Alarm on/off<br />
Record Mode<br />
Points<br />
Points (Trigger)<br />
Record rate<br />
Disk Full Alarm<br />
Format Disk<br />
Save CFG File<br />
Load CFG File<br />
Filename<br />
Figure 4-15<br />
Record Menu<br />
This section deals with setting up<br />
the recording of data to the disk,<br />
either floppy disk or PCMCIA<br />
memory card. The Programming<br />
menu for Record Setup is shown<br />
in Figure 4-15. You can choose<br />
whether to record only data<br />
(Data on/off) and which points to<br />
record (Points), or to record only<br />
Alarm/Event information (Alarm<br />
on/off), or record both data and<br />
alarm/event information. Points<br />
(Trigger) enables you to set up<br />
which alarm points will stop or<br />
start recording. The Record Mode sets up whether<br />
data is recorded to fill the disk and stop, or to cycle<br />
around continuously, replacing the oldest data with<br />
the newest, as well as setting the average or<br />
instantaneous sample storage method.<br />
The Disk Full Alarm option allows you to set the full<br />
threshold to alarm the fact that the disk is getting<br />
full, while the Filename option allows you to enter a<br />
unique file name for each recording session. The<br />
exact details of each menu option is given below.<br />
NOTE<br />
The menu options cannot be accessed while<br />
the unit is recording. Use the “record on/off”<br />
option in the function menu to stop the unit<br />
recording prior to attempting to access this<br />
menu!<br />
Siemens AG C79000-G7374-C211-01<br />
<strong>SIREC</strong> D Manual


