SIREC D Display Recorder 7ND4000
SIREC D Display Recorder 7ND4000
SIREC D Display Recorder 7ND4000
Sie wollen auch ein ePaper? Erhöhen Sie die Reichweite Ihrer Titel.
YUMPU macht aus Druck-PDFs automatisch weboptimierte ePaper, die Google liebt.
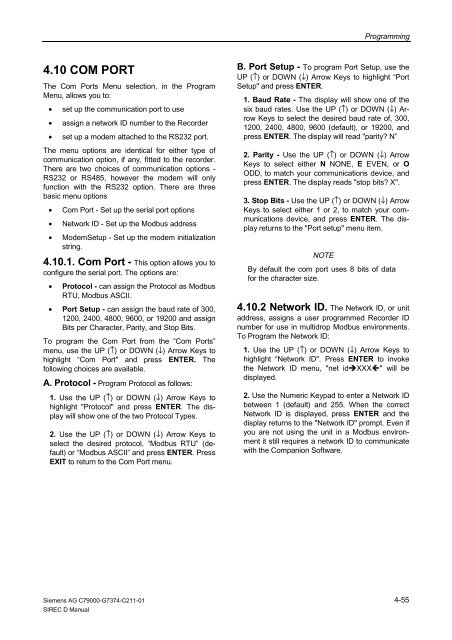
4.10 COM PORT<br />
The Com Ports Menu selection, in the Program<br />
Menu, allows you to:<br />
• set up the communication port to use<br />
• assign a network ID number to the <strong>Recorder</strong><br />
• set up a modem attached to the RS232 port.<br />
The menu options are identical for either type of<br />
communication option, if any, fitted to the recorder.<br />
There are two choices of communication options -<br />
RS232 or RS485, however the modem will only<br />
function with the RS232 option. There are three<br />
basic menu options<br />
• Com Port - Set up the serial port options<br />
• Network ID - Set up the Modbus address<br />
• ModemSetup - Set up the modem initialization<br />
string.<br />
4.10.1. Com Port - This option allows you to<br />
configure the serial port. The options are:<br />
• Protocol - can assign the Protocol as Modbus<br />
RTU, Modbus ASCII.<br />
• Port Setup - can assign the baud rate of 300,<br />
1200, 2400, 4800, 9600, or 19200 and assign<br />
Bits per Character, Parity, and Stop Bits.<br />
To program the Com Port from the “Com Ports”<br />
menu, use the UP (↑) or DOWN (↓) Arrow Keys to<br />
highlight “Com Port" and press ENTER. The<br />
following choices are available.<br />
A. Protocol - Program Protocol as follows:<br />
1. Use the UP (↑) or DOWN (↓) Arrow Keys to<br />
highlight "Protocol" and press ENTER. The display<br />
will show one of the two Protocol Types.<br />
2. Use the UP (↑) or DOWN (↓) Arrow Keys to<br />
select the desired protocol, “Modbus RTU” (default)<br />
or “Modbus ASCII” and press ENTER. Press<br />
EXIT to return to the Com Port menu.<br />
Siemens AG C79000-G7374-C211-01<br />
<strong>SIREC</strong> D Manual<br />
Programming<br />
B. Port Setup - To program Port Setup, use the<br />
UP (↑) or DOWN (↓) Arrow Keys to highlight “Port<br />
Setup" and press ENTER.<br />
1. Baud Rate - The display will show one of the<br />
six baud rates. Use the UP (↑) or DOWN (↓) Arrow<br />
Keys to select the desired baud rate of, 300,<br />
1200, 2400, 4800, 9600 (default), or 19200, and<br />
press ENTER. The display will read "parity? N”<br />
2. Parity - Use the UP (↑) or DOWN (↓) Arrow<br />
Keys to select either N NONE, E EVEN, or O<br />
ODD, to match your communications device, and<br />
press ENTER. The display reads "stop bits? X".<br />
3. Stop Bits - Use the UP (↑) or DOWN (↓) Arrow<br />
Keys to select either 1 or 2, to match your communications<br />
device, and press ENTER. The display<br />
returns to the "Port setup" menu item.<br />
NOTE<br />
By default the com port uses 8 bits of data<br />
for the character size.<br />
4.10.2 Network ID. The Network ID, or unit<br />
address, assigns a user programmed <strong>Recorder</strong> ID<br />
number for use in multidrop Modbus environments.<br />
To Program the Network ID:<br />
1. Use the UP (↑) or DOWN (↓) Arrow Keys to<br />
highlight “Network ID". Press ENTER to invoke<br />
the Network ID menu, "net id�XXX�" will be<br />
displayed.<br />
2. Use the Numeric Keypad to enter a Network ID<br />
between 1 (default) and 255. When the correct<br />
Network ID is displayed, press ENTER and the<br />
display returns to the "Network ID" prompt. Even if<br />
you are not using the unit in a Modbus environment<br />
it still requires a network ID to communicate<br />
with the Companion Software.<br />
4-55


