SIREC D Display Recorder 7ND4000
SIREC D Display Recorder 7ND4000
SIREC D Display Recorder 7ND4000
Erfolgreiche ePaper selbst erstellen
Machen Sie aus Ihren PDF Publikationen ein blätterbares Flipbook mit unserer einzigartigen Google optimierten e-Paper Software.
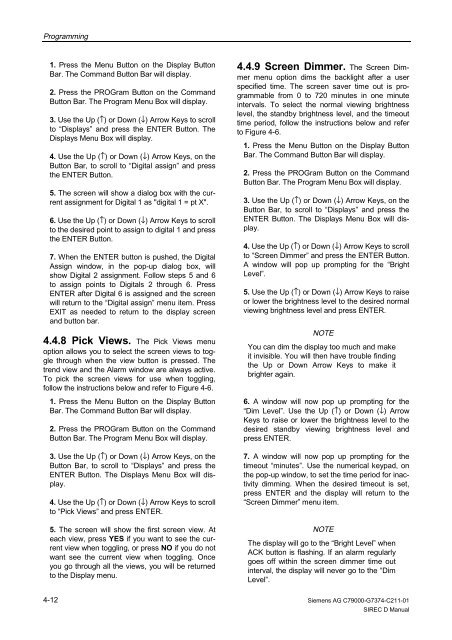
Programming<br />
1. Press the Menu Button on the <strong>Display</strong> Button<br />
Bar. The Command Button Bar will display.<br />
2. Press the PROGram Button on the Command<br />
Button Bar. The Program Menu Box will display.<br />
3. Use the Up (↑) or Down (↓) Arrow Keys to scroll<br />
to “<strong>Display</strong>s” and press the ENTER Button. The<br />
<strong>Display</strong>s Menu Box will display.<br />
4. Use the Up (↑) or Down (↓) Arrow Keys, on the<br />
Button Bar, to scroll to “Digital assign” and press<br />
the ENTER Button.<br />
5. The screen will show a dialog box with the current<br />
assignment for Digital 1 as "digital 1 = pt X".<br />
6. Use the Up (↑) or Down (↓) Arrow Keys to scroll<br />
to the desired point to assign to digital 1 and press<br />
the ENTER Button.<br />
7. When the ENTER button is pushed, the Digital<br />
Assign window, in the pop-up dialog box, will<br />
show Digital 2 assignment. Follow steps 5 and 6<br />
to assign points to Digitals 2 through 6. Press<br />
ENTER after Digital 6 is assigned and the screen<br />
will return to the “Digital assign” menu item. Press<br />
EXIT as needed to return to the display screen<br />
and button bar.<br />
4.4.8 Pick Views. The Pick Views menu<br />
option allows you to select the screen views to toggle<br />
through when the view button is pressed. The<br />
trend view and the Alarm window are always active.<br />
To pick the screen views for use when toggling,<br />
follow the instructions below and refer to Figure 4-6.<br />
1. Press the Menu Button on the <strong>Display</strong> Button<br />
Bar. The Command Button Bar will display.<br />
2. Press the PROGram Button on the Command<br />
Button Bar. The Program Menu Box will display.<br />
3. Use the Up (↑) or Down (↓) Arrow Keys, on the<br />
Button Bar, to scroll to “<strong>Display</strong>s” and press the<br />
ENTER Button. The <strong>Display</strong>s Menu Box will display.<br />
4. Use the Up (↑) or Down (↓) Arrow Keys to scroll<br />
to “Pick Views” and press ENTER.<br />
5. The screen will show the first screen view. At<br />
each view, press YES if you want to see the current<br />
view when toggling, or press NO if you do not<br />
want see the current view when toggling. Once<br />
you go through all the views, you will be returned<br />
to the <strong>Display</strong> menu.<br />
4-12<br />
4.4.9 Screen Dimmer. The Screen Dimmer<br />
menu option dims the backlight after a user<br />
specified time. The screen saver time out is programmable<br />
from 0 to 720 minutes in one minute<br />
intervals. To select the normal viewing brightness<br />
level, the standby brightness level, and the timeout<br />
time period, follow the instructions below and refer<br />
to Figure 4-6.<br />
1. Press the Menu Button on the <strong>Display</strong> Button<br />
Bar. The Command Button Bar will display.<br />
2. Press the PROGram Button on the Command<br />
Button Bar. The Program Menu Box will display.<br />
3. Use the Up (↑) or Down (↓) Arrow Keys, on the<br />
Button Bar, to scroll to “<strong>Display</strong>s” and press the<br />
ENTER Button. The <strong>Display</strong>s Menu Box will display.<br />
4. Use the Up (↑) or Down (↓) Arrow Keys to scroll<br />
to “Screen Dimmer” and press the ENTER Button.<br />
A window will pop up prompting for the “Bright<br />
Level”.<br />
5. Use the Up (↑) or Down (↓) Arrow Keys to raise<br />
or lower the brightness level to the desired normal<br />
viewing brightness level and press ENTER.<br />
NOTE<br />
You can dim the display too much and make<br />
it invisible. You will then have trouble finding<br />
the Up or Down Arrow Keys to make it<br />
brighter again.<br />
6. A window will now pop up prompting for the<br />
“Dim Level”. Use the Up (↑) or Down (↓) Arrow<br />
Keys to raise or lower the brightness level to the<br />
desired standby viewing brightness level and<br />
press ENTER.<br />
7. A window will now pop up prompting for the<br />
timeout “minutes”. Use the numerical keypad, on<br />
the pop-up window, to set the time period for inactivity<br />
dimming. When the desired timeout is set,<br />
press ENTER and the display will return to the<br />
“Screen Dimmer” menu item.<br />
NOTE<br />
The display will go to the “Bright Level” when<br />
ACK button is flashing. If an alarm regularly<br />
goes off within the screen dimmer time out<br />
interval, the display will never go to the “Dim<br />
Level”.<br />
Siemens AG C79000-G7374-C211-01<br />
<strong>SIREC</strong> D Manual


