ChromeGate 3.3.2 Software Manual - KNAUER Advanced Scientific ...
ChromeGate 3.3.2 Software Manual - KNAUER Advanced Scientific ...
ChromeGate 3.3.2 Software Manual - KNAUER Advanced Scientific ...

You also want an ePaper? Increase the reach of your titles
YUMPU automatically turns print PDFs into web optimized ePapers that Google loves.
96 Creating an Instrument Control Method<br />
Used Channels:<br />
Check the box(es) to turn the acquisition for the selected channel(s) on. If<br />
the box is not selected, no data will be acquired and no time program will<br />
be executed for this channel. As many channels are activated (at least<br />
one) as many wavelength columns appear in the spreadsheet below. You<br />
can only enable the number of channels you have activated in the<br />
instrument configuration setup of the device.<br />
The wavelength table is a spreadsheet to enter your time (detector)<br />
program. In the first row (at time 0.00 min), enter the initial wavelength(s)<br />
in nm. For up to 50 steps (time in minutes), you can then define the<br />
detector parameters. The editing principle including programming the<br />
digital outs is the same as for the time (gradient) program, described in<br />
the chapter Instrument Setup – Pumps, Pump Program.<br />
Autozero at start<br />
Check the Autozero field, if you wish the signal to be zeroed at<br />
measurement start (to define the current signal as the baseline). You<br />
cannot disable this option if you are acquiring 3D data in the advanced<br />
mode of the detector.<br />
Autozero at WL change<br />
Check this option if you wish the signal to be zeroed at the moment the<br />
wavelength is changed (to define the current signal as the baseline).<br />
Lamp OFF at the end of run<br />
Check the Lamp OFF box to switch off the detector lamp after a<br />
measurement is finished. This option may be used for the shutdown<br />
methods.<br />
You should switch the lamp on either manually or from the direct<br />
control window before you start the next working session. After<br />
power up, allow 30 minutes for the lamp to stabilize before running<br />
samples that may require sensitive measurements.<br />
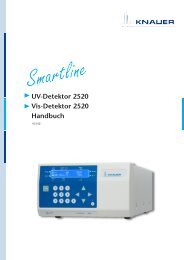
Scan, nm [Range 190 – 740 nm]<br />
This section allows you to specify the scan spectral interval, in nm.<br />
Start<br />
Enter the start wavelength for the scan in nm.<br />
End<br />
Enter the end wavelength for the scan in nm.<br />
The scan section limits Start and End are important even if no PDA<br />
option is available. All measuring wavelengths in the used channels<br />
1 to 4 must be within these limits.<br />
Acquire 3D data<br />
You have access to this selection field only with the PDA option. The<br />
<strong>Advanced</strong>… button becomes accessible if the Acquire 3D data check<br />
mark is set.<br />
Fig. 140 Detector K-2600 setup window with PDA option<br />
A click on the <strong>Advanced</strong>… button will open the following dialog box.