

Bravo & Brava • 1995 To 2000
Bravo & Brava • 1995 To 2000
Bravo & Brava • 1995 To 2000

Create successful ePaper yourself
Turn your PDF publications into a flip-book with our unique Google optimized e-Paper software.
2 During the bleeding procedure, add only<br />
clean, unused hydraulic fluid of the<br />
recommended type; never re-use fluid that<br />
has already been bled from the system.<br />
Ensure that sufficient fluid is available before<br />
starting work.<br />
3 If there is any possibility of incorrect fluid<br />
being already in the system, the brake<br />
components and circuit must be flushed<br />
completely with uncontaminated, correct<br />
fluid, and new seals should be fitted<br />
throughout the system.<br />
4 If hydraulic fluid has been lost from the<br />
system, or air has entered because of a leak,<br />
ensure that the fault is cured before<br />
proceeding further.<br />
5 Park the vehicle on level ground, and<br />
switch off the engine. Alternatively, position<br />
the car over a pit or on car ramps.<br />
6 Check that all pipes and hoses are secure,<br />
unions tight and bleed screws closed.<br />
Remove the dust caps (where applicable), and<br />
clean any dirt from around the bleed screws.<br />
7 Unscrew the master cylinder reservoir cap,<br />
and top-up the master cylinder reservoir to<br />
the MAX level line; refit the cap loosely.<br />
Remember to maintain the fluid level at least<br />
above the MIN level line throughout the<br />
procedure, otherwise there is a risk of further<br />
air entering the system.<br />
8 There are a number of one-man, do-ityourself<br />
brake bleeding kits currently available<br />
from motor accessory shops. It is<br />
recommended that one of these kits is used<br />
whenever possible, as they greatly simplify<br />
the bleeding operation, and also reduce the<br />
risk of expelled air and fluid being drawn back<br />
into the system. If such a kit is not available,<br />
the basic (two-man) method must be used,<br />
which is described in detail below.<br />
9 If a kit is to be used, prepare the vehicle as<br />
described previously, and follow the kit<br />
manufacturer's instructions, as the procedure<br />
may vary slightly according to the type being<br />
used; generally, they are as outlined below in<br />
the relevant sub-section.<br />
10 Whichever method is used, the same<br />
sequence must be followed (paragraphs 11<br />
and 12) to ensure the removal of all air from<br />
the system.<br />
Bleeding sequence<br />
11 If the system has been only partially<br />
disconnected, and suitable precautions were<br />
taken to minimise fluid loss, it should be<br />
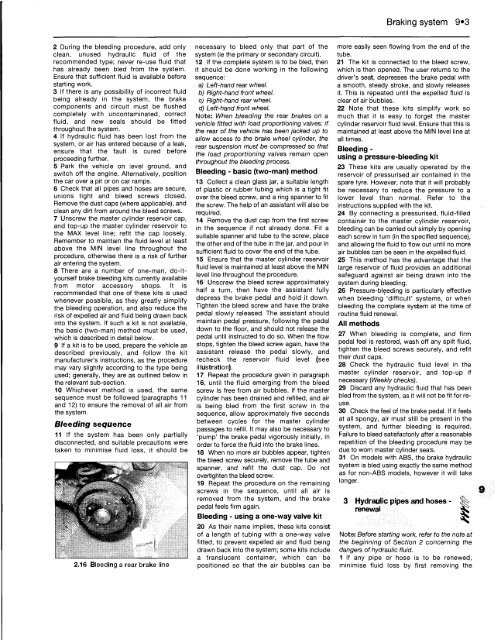
2.16 Bleeding a rear brake line<br />
necessary to bleed only that part of the<br />
system (ie the primary or secondary circuit).<br />
12 If the complete system is to be bled, then<br />
it should be done working in the following<br />
sequence:<br />
a) Left-hand rear wheel.<br />
b) Right-hand front wheel.<br />
c) Right-hand rear wheel.<br />
d) Left-hand front wheel.<br />
Note: When bleeding the rear brakes on a<br />
vehicle fitted with load proportioning valves: if<br />
the rear of the vehicle has been jacked up to<br />
allow access to the brake wheel cylinder, the<br />
rear suspension must be compressed so that<br />
the load proportioning valves remain open<br />
throughout the bleeding process.<br />
Bleeding - basic (two-man) method<br />
13 Collect a clean glass jar, a suitable length<br />
of plastic or rubber tubing which is a tight fit<br />
over the bleed screw, and a ring spanner to fit<br />
the screw. The help of an assistant will also be<br />
required.<br />
14 Remove the dust cap from the first screw<br />
in the sequence if not already done. Fit a<br />
suitable spanner and tube to the screw, place<br />
the other end of the tube in the jar, and pour in<br />
sufficient fluid to cover the end of the tube.<br />
15 Ensure that the master cylinder reservoir<br />
fluid level is maintained at least above the MIN<br />
level line throughout the procedure.<br />
16 Unscrew the bleed screw approximately<br />
half a turn, then have the assistant fully<br />
depress the brake pedal and hold it down.<br />
Tighten the bleed screw and have the brake<br />
pedal slowly released. The assistant should<br />
maintain pedal pressure, following the pedal<br />
down to the floor, and should not release the<br />
pedal until instructed to do so. When the flow<br />
stops, tighten the bleed screw again, have the<br />
assistant release the pedal slowly, and<br />
recheck the reservoir fluid level (see<br />
illustration).<br />
17 Repeat the procedure given in paragraph<br />
16, until the fluid emerging from the bleed<br />
screw is free from air bubbles. If the master<br />
cylinder has been drained and refilled, and air<br />
is being bled from the first screw in the<br />
sequence, allow approximately five seconds<br />
between cycles for the master cylinder<br />
passages to refill. It may also be necessary to<br />
'pump' the brake pedal vigorously initially, in<br />
order to force the fluid into the brake lines.<br />
18 When no more air bubbles appear, tighten<br />
the bleed screw securely, remove the tube and<br />
spanner, and refit the dust cap. Do not<br />
overtighten the bleed screw.<br />
19 Repeat the procedure on the remaining<br />
screws in the sequence, until all air is<br />
removed from the system, and the brake<br />
pedal feels firm again.<br />
Bleeding - using a one-way valve kit<br />
20 As their name implies, these kits consist<br />
of a length of tubing with a one-way valve<br />
fitted, to prevent expelled air and fluid being<br />
drawn back into the system; some kits include<br />
a translucent container, which can be<br />
positioned so that the air bubbles can be<br />
Braking system 9*3<br />
more easily seen flowing from the end of the<br />
tube.<br />
21 The kit is connected to the bleed screw,<br />
which is then opened. The user returns to the<br />
driver's seat, depresses the brake pedal with<br />
a smooth, steady stroke, and slowly releases<br />
it. This is repeated until the expelled fluid is<br />
clear of air bubbles.<br />
22 Note that these kits simplify work so<br />
much that it is easy to forget the master<br />
cylinder reservoir fluid level. Ensure that this is<br />
maintained at least above the MIN level line at<br />
all times.<br />
Bleeding -<br />
using a pressure-bleeding kit<br />
23 These kits are usually operated by the<br />
reservoir of pressurised air contained in the<br />
spare tyre. However, note that it will probably<br />
be necessary to reduce the pressure to a<br />
lower level than normal. Refer to the<br />
instructions supplied with the kit.<br />
24 By connecting a pressurised, fluid-filled<br />
container to the master cylinder reservoir,<br />
bleeding can be carried out simply by opening<br />
each screw in turn (in the specified sequence),<br />
and allowing the fluid to flow out until no more<br />
air bubbles can be seen in the expelled fluid.<br />
25 This method has the advantage that the<br />
large reservoir of fluid provides an additional<br />
safeguard against air being drawn into the<br />
system during bleeding.<br />
26 Pressure-bleeding is particularly effective<br />
when bleeding 'difficult' systems, or when<br />
bleeding the complete system at the time of<br />
routine fluid renewal.<br />
All methods<br />
27 When bleeding is complete, and firm<br />
pedal feel is restored, wash off any spilt fluid,<br />
tighten the bleed screws securely, and refit<br />
their dust caps.<br />
28 Check the hydraulic fluid level in the<br />
master cylinder reservoir, and top-up if<br />
necessary (Weekly checks).<br />
29 Discard any hydraulic fluid that has been<br />
bled from the system, as it will not be fit for reuse.<br />
30 Check the feel of the brake pedal. If it feels<br />
at all spongy, air must still be present in the<br />
system, and further bleeding is required.<br />
Failure to bleed satisfactorily after a reasonable<br />
repetition of the bleeding procedure may be<br />
due to worn master cylinder seals.<br />
31 On models with ABS, the brake hydraulic<br />
system is bled using exactly the same method<br />
as for non-ABS models, however it will take<br />
longer.<br />
3 Hydraulic pipes and hoses - %»<br />
renewal |s<br />
Note: Before starting work, refer to the note at<br />
the beginning of Section 2 concerning the<br />
dangers of hydraulic fluid.<br />
1 If any pipe or hose is to be renewed,<br />
minimise fluid loss by first removing the


