

Bravo & Brava • 1995 To 2000
Bravo & Brava • 1995 To 2000
Bravo & Brava • 1995 To 2000

Create successful ePaper yourself
Turn your PDF publications into a flip-book with our unique Google optimized e-Paper software.
Automatic transmission models<br />
64 Remove the torque converter restraint from<br />
the face of the bellhousing. Check that the<br />
torque converter is still fully engaged with the<br />
transmission fluid pump.<br />
65 Refit the backplate, then carefully offer up<br />
the transmission to the cylinder block.<br />
Observe the markings made during the<br />
removal, to ensure correct alignment between<br />
the torque converter and the driveplate.<br />
66 Refit the bellhousing bolts to the positions<br />
noted on removal, hand-tightening them to<br />
secure the transmission in position. Note: Do<br />
not tighten them to force the engine and<br />
transmission together. Ensure that the<br />
bellhousing and cylinder block mating faces<br />
will butt together evenly without obstruction,<br />
before tightening the bolts and nuts fully.<br />
All models<br />
67 Refit the transmission lower cover,<br />
tightening the bolts securely.<br />
68 Refit the starter motor, referring to<br />
Chapter 5A if necessary.<br />
69 Reconnect any wiring on the<br />
engine/transmission assembly, routing it as<br />
noted on removal.<br />
Refitting<br />
70 Manoeuvre the engine and transmission<br />
into place under the front of the car.<br />
71 Attach the hoist or engine support bar to<br />
the engine.<br />
72 With the help of an assistant, carefully lift<br />
the assembly up into the engine compartment<br />
and onto the engine mountings, taking care<br />
not to damage the surrounding components.<br />
73 Reconnect the engine/transmission<br />
mountings, and tighten the nuts and bolts.<br />
74 When the engine is securely reconnected,<br />
disconnect the hoist from the engine.<br />
75 The remainder of the refitting procedure is<br />
the direct reverse of the removal procedure,<br />
noting the following points:<br />
a) Ensure that all sections of the wiring<br />
harness follow their original routing; use<br />
new cable-ties to secure the harness in<br />
position, keeping it away from sources of<br />
heat and abrasion.<br />
b) On vehicles with manual transmission,<br />
check and if necessary adjust the<br />
gearchange linkage with reference to<br />
Chapter 7A.<br />
c) On vehicles with automatic transmission,<br />
check and if necessary adjust the kickdown<br />
and selector cables with reference<br />
to Chapter 7B.<br />
d) Ensure that all hoses are correctly routed<br />
and are secured with the correct hose<br />
clips, where applicable. If the hose clips<br />
cannot be used again; proprietary wormdrive<br />
clips should be fitted in their place.<br />
e) Befill the cooling system as described in<br />
Chapter 1.<br />
f) Refill the engine with appropriate grade<br />
and quantity of oil (Chapter 1).<br />
g) Refill or top-up the transmission oil or<br />
fluid (see Chapter 1 or Chapter 7).<br />
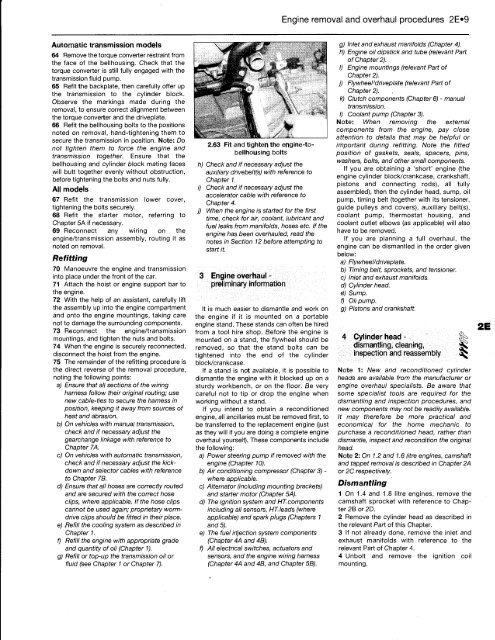
2.63 Fit and tighten the engine-tobellhousing<br />
bolts<br />
h) Check and if necessary adjust the<br />
auxiliary drivebelt(s) with reference to<br />
Chapter 1.<br />
i) Check and if necessary adjust the<br />
accelerator cable with reference to<br />
Chapter 4.<br />
j) When the engine is started for the first<br />
time, check for air, coolant, lubricant and<br />
fuel leaks from manifolds, hoses etc. If the<br />
engine has been overhauled, read the<br />
notes in Section 12 before attempting to<br />
start it.<br />
3 Engine overhaul -<br />
preliminary information<br />
It is much easier to dismantle and work on<br />
the engine if it is mounted on a portable<br />
engine stand. These stands can often be hired<br />
from a tool hire shop. Before the engine is<br />
mounted on a stand, the flywheel should be<br />
removed, so that the stand bolts can be<br />
tightened into the end of the cylinder<br />
block/crankcase.<br />
If a stand is not available, it is possible to<br />
dismantle the engine with it blocked up on a<br />
sturdy workbench, or on the floor. Be very<br />
careful not to tip or drop the engine when<br />
working without a stand.<br />
If you intend to obtain a reconditioned<br />
engine, all ancillaries must be removed first, to<br />
be transferred to the replacement engine (just<br />
as they will if you are doing a complete engine<br />
overhaul yourself). These components include<br />
the following:<br />
a) Power steering pump if removed with the<br />
engine (Chapter 10).<br />
b) Air conditioning compressor (Chapter 3) -<br />
where applicable.<br />
c) Alternator (including mounting brackets)<br />
and starter motor (Chapter 5A).<br />
d) The ignition system and HT components<br />
including all sensors, HT leads (where<br />
applicable) and spark plugs (Chapters 1<br />
and 5).<br />
e) The fuel injection system components<br />
(Chapter 4A and 4B).<br />
f) All electrical switches, actuators and<br />
sensors, and the engine wiring harness<br />
(Chapter 4A and 4B, and Chapter 5B).<br />
Engine removal and overhaul procedures 2E«9<br />
g) Inlet and exhaust manifolds (Chapter 4).<br />
h) Engine oil dipstick and tube (relevant Part<br />
of Chapter 2).<br />
I) Engine mountings (relevant Part of<br />
Chapter 2).<br />
j) Flywheel'driveplate (relevant Part of<br />
Chapter 2).<br />
k) Clutch components (Chapter 6) - manual<br />
transmission.<br />
I) Coolant pump (Chapter 3).<br />
Note: When removing the external<br />
components from the engine, pay close<br />
attention to details that may be helpful or<br />
important during refitting. Note the fitted<br />
position of gaskets, seals, spacers, pins,<br />
washers, bolts, and other small components.<br />
If you are obtaining a 'short' engine (the<br />
engine cylinder block/crankcase, crankshaft,<br />
pistons and connecting rods), all fully<br />
assembled), then the cylinder head, sump, oil<br />
pump, timing belt (together with its tensioner,<br />
guide pulleys and covers), auxiliary belt(s),<br />
coolant pump, thermostat housing, and<br />
coolant outlet elbows (as applicable) will also<br />
have to be removed.<br />
If you are planning a full overhaul, the<br />
engine can be dismantled in the order given<br />
below:<br />
a) Flywheel/driveplate.<br />
b) Timing belt, sprockets, and tensioner.<br />
c) Inlet and exhaust manifolds.<br />
d) Cylinder head.<br />
e) Sump.<br />
f) Oil pump.<br />
g) Pistons and crankshaft.<br />
4 Cylinder head - ^<br />
dismantling, cleaning,<br />
inspection and reassembly 3^<br />
Note 1: New and reconditioned cylinder<br />
heads are available from the manufacturer or<br />
engine overhaul specialists. Be aware that<br />
some specialist tools are required for the<br />
dismantling and inspection procedures, and<br />
new components may not be readily available.<br />
It may therefore be more practical and<br />
economical for the home mechanic to<br />
purchase a reconditioned head, rather than<br />
dismantle, inspect and recondition the original<br />
head.<br />
Note 2: On 1.2 and 1.6 litre engines, camshaft<br />
and tappet removal is described in Chapter 2A<br />
or 2C respectively.<br />
Dismantling<br />
1 On 1.4 and 1.8 litre engines, remove the<br />
camshaft sprocket with reference to Chapter<br />
2B or 2D.<br />
2 Remove the cylinder head as described in<br />
the relevant Part of this Chapter.<br />
3 If not already done, remove the inlet and<br />
exhaust manifolds with reference to the<br />
relevant Part of Chapter 4.<br />
4 Unbolt and remove the ignition coil<br />
mounting.


