

Bravo & Brava • 1995 To 2000
Bravo & Brava • 1995 To 2000
Bravo & Brava • 1995 To 2000

You also want an ePaper? Increase the reach of your titles
YUMPU automatically turns print PDFs into web optimized ePapers that Google loves.
3*10 Cooling, heating and ventilation systems<br />
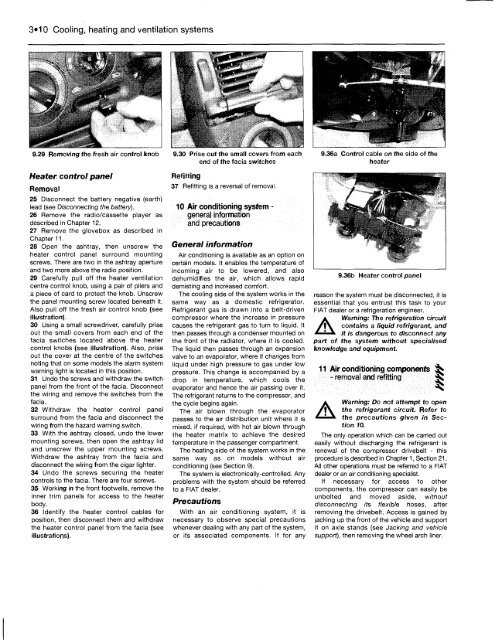
9.29 Removing the fresh air control knob<br />
Heater control panel<br />
Removal<br />
25 Disconnect the battery negative (earth)<br />
lead (see Disconnecting the battery).<br />
26 Remove the radio/cassette player as<br />
described in Chapter 12.<br />
27 Remove the glovebox as described in<br />
Chapter 11.<br />
28 Open the ashtray, then unscrew the<br />
heater control panel surround mounting<br />
screws. There are two in the ashtray aperture<br />
and two more above the radio position.<br />
29 Carefully pull off the heater ventilation<br />
centre control knob, using a pair of pliers and<br />
a piece of card to protect the knob. Unscrew<br />
the panel mounting screw located beneath it.<br />
Also pull off the fresh air control knob (see<br />
illustration).<br />
30 Using a small screwdriver, carefully prise<br />
out the small covers from each end of the<br />
facia switches located above the heater<br />
control knobs (see illustration). Also, prise<br />
out the cover at the centre of the switches<br />
noting that on some models the alarm system<br />
warning light is located in this position.<br />
31 Undo the screws and withdraw the switch<br />
panel from the front of the facia. Disconnect<br />
the wiring and remove the switches from the<br />
facia.<br />
32 Withdraw the heater control panel<br />
surround from the facia and disconnect the<br />
wiring from the hazard warning switch.<br />
33 With the ashtray closed, undo the lower<br />
mounting screws, then open the ashtray lid<br />
and unscrew the upper mounting screws.<br />
Withdraw the ashtray from the facia and<br />
disconnect the wiring from the cigar lighter.<br />
34 Undo the screws securing the heater<br />
controls to the facia. There are four screws.<br />
35 Working in the front footwells, remove the<br />
inner trim panels for access to the heater<br />
body.<br />
36 Identify the heater control cables for<br />
position, then disconnect them and withdraw<br />
the heater control panel from the facia (see<br />
illustrations).<br />
9.30 Prise out the small covers from each<br />
end of the facia switches<br />
Refitting<br />
37 Refitting is a reversal of removal.<br />
10 Air conditioning system -<br />
general information<br />
and precautions<br />
General information<br />
Air conditioning is available as an option on<br />
certain models. It enables the temperature of<br />
incoming air to be lowered, and also<br />
dehumidifies the air, which allows rapid<br />
demisting and increased comfort.<br />
The cooling side of the system works in the<br />
same way as a domestic refrigerator.<br />
Refrigerant gas is drawn into a belt-driven<br />
compressor where the increase in pressure<br />
causes the refrigerant gas to turn to liquid. It<br />
then passes through a condenser mounted on<br />
the front of the radiator, where it is cooled.<br />
The liquid then passes through an expansion<br />
valve to an evaporator, where it changes from<br />
liquid under high pressure to gas under low<br />
pressure. This change is accompanied by a<br />
drop in temperature, which cools the<br />
evaporator and hence the air passing over it.<br />
The refrigerant returns to the compressor, and<br />
the cycle begins again.<br />
The air blown through the evaporator<br />
passes to the air distribution unit where it is<br />
mixed, if required, with hot air blown through<br />
the heater matrix to achieve the desired<br />
temperature in the passenger compartment.<br />
The heating side of the system works in the<br />
same way as on models without air<br />
conditioning (see Section 9).<br />
The system is electronically-controlled. Any<br />
problems with the system should be referred<br />
to a FIAT dealer.<br />
Precautions<br />
With an air conditioning system, it is<br />
necessary to observe special precautions<br />
whenever dealing with any part of the system,<br />
or its associated components. If for any<br />
9.36a Control cable on the side of the<br />
heater<br />
9.36b Heater control panel<br />
reason the system must be disconnected, it is<br />
essential that you entrust this task to your<br />
FIAT dealer or a refrigeration engineer.<br />
Warning: The refrigeration circuit<br />
contains a liquid refrigerant, and<br />
it is dangerous to disconnect any<br />
part of the system without specialised<br />
knowledge and equipment.<br />
11 Air conditioning components gS<br />
- removal and refitting<br />
A<br />
Warning: Do not attempt to open<br />
the refrigerant circuit. Refer to<br />
the precautions given in Section<br />
10.<br />
The only operation which can be carried out<br />
easily without discharging the refrigerant is<br />
renewal of the compressor drivebelt - this<br />
procedure is described in Chapter 1, Section 21.<br />
All other operations must be referred to a FIAT<br />
dealer or an air conditioning specialist.<br />
If necessary for access to other<br />
components, the compressor can easily be<br />
unbolted and moved aside, without<br />
disconnecting its flexible hoses, after<br />
removing the drivebelt. Access is gained by<br />
jacking up the front of the vehicle and support<br />
it on axle stands (see Jacking and vehicle<br />
support), then removing the wheel arch liner.


