

Bravo & Brava • 1995 To 2000
Bravo & Brava • 1995 To 2000
Bravo & Brava • 1995 To 2000

Create successful ePaper yourself
Turn your PDF publications into a flip-book with our unique Google optimized e-Paper software.
2 <strong>To</strong> fully check the operation of the handbrake,<br />
chock the front wheels, then jack up the<br />
rear of the car and support it on axle stands.<br />
3 Release the handbrake completely, and<br />
check that both rear wheels are free to turn. If<br />
this is not the case, either the handbrake has<br />
been over-adjusted, the cable is binding, or<br />
there is a problem with the rear drums (investigate<br />
using the information in Chapter 9).<br />
4 Apply the handbrake by three clicks of the<br />
ratchet. By this point, both rear wheels should<br />
become difficult to turn by hand. By the time the<br />
lever has been set to the fifth notch (if not before)<br />
the wheels should be completely locked.<br />
5 In practice, it may be found that the lever<br />
will not travel five notches - provided the<br />
handbrake releases completely, and can be<br />
fully applied, it is perhaps unnecessary to<br />
adjust the cable in this instance. If the lever<br />
travels more than five notches, adjustment is<br />
required, as follows.<br />
6 Remove the gaiter from the handbrake<br />
lever, for access to the adjuster nut. The gaiter<br />
clips into a collar/groove at the base of the<br />
handbrake grip, and has a lip around its base<br />
which clips into the hole in the centre console.<br />
Release the gaiter, and lift it over the<br />
handbrake lever.<br />
7 Adjust the nut at the base of the lever as<br />
required, until the operation of the handbrake<br />
is satisfactory. On completion, lower the rear<br />
of the car to the ground.<br />
Every 24 000 miles (40 000 km) 1.19<br />
24 Exhaust emissions check ^><br />
This check is part of the manufacturer's<br />
maintenance schedule, and involves testing<br />
the exhaust emissions using an exhaust gas<br />
analyser. Unless a fault is suspected, this test<br />
is not essential, although it should be noted<br />
that it is recommended by the manufacturers.<br />
In the majority of cases, adjusting the idle<br />
speed and mixture is either not possible, or<br />
requires access to dedicated FIAT test<br />
equipment. Exhaust emissions testing is<br />
included as part of the MoT test.<br />
25 Engine management system jK<br />
fault code check<br />
1 This check is part of the manufacturer's<br />
maintenance schedule, and involves<br />
'interrogating' the engine management<br />
control unit (and those for the automatic<br />
transmission and/or ABS, as applicable) using<br />
special dedicated test equipment. Such<br />
testing will allow the test equipment to read<br />
any fault codes stored in the electronic control<br />
unit memory (see illustration).<br />
Every 36 000 miles (60 000 km)<br />
26 Brake fluid renewal<br />
A<br />
1<br />
Warning: Brake hydraulic fluid<br />
can harm your eyes and damage<br />
painted surfaces, so use extreme<br />
caution when handling and pouring it. Do<br />
not use fluid that has been standing open<br />
for some time, as it absorbs moisture from<br />
the air. Excess moisture can cause a<br />
dangerous loss of braking effectiveness.<br />
1 The procedure is similar to that for the<br />
bleeding of the hydraulic system as described<br />
in Chapter 9. The brake fluid reservoir should<br />
be emptied by siphoning, using a clean<br />
poultry baster or similar before starting, and<br />
allowance should be made for the old fluid to<br />
be expelled when bleeding a section of the<br />
circuit.<br />
2 Working as described in Chapter 9, open<br />
the first bleed screw in the sequence, and<br />
pump the brake pedal gently until nearly all<br />
the old fluid has been emptied from the<br />
master cylinder reservoir.<br />
^<br />
Old hydraulic fluid is often<br />
much darker in colour than<br />
the new, making it easy to<br />
distinguish the two.<br />
3 <strong>To</strong>p-up to the MAX level with new fluid, and<br />
continue pumping until only the new fluid<br />
remains in the reservoir, and new fluid can be<br />
seen emerging from the bleed screw. Tighten<br />
the screw, and top the reservoir level up to the<br />
MAX level line.<br />
4 Work through all the remaining bleed screws<br />
in the sequence until new fluid can be seen at<br />
all of them. Be careful to keep the master<br />
cylinder reservoir topped-up to above the MIN<br />
level at all times, or air may enter the system<br />
and greatly increase the length of the task.<br />
5 When the operation is complete, check that<br />
all bleed screws are securely tightened, and<br />
that their dust caps are refitted. Wash off all<br />
traces of spilt fluid, and recheck the fluid level.<br />
27.3 Unscrewing the transmission oil<br />
filler/level plug<br />
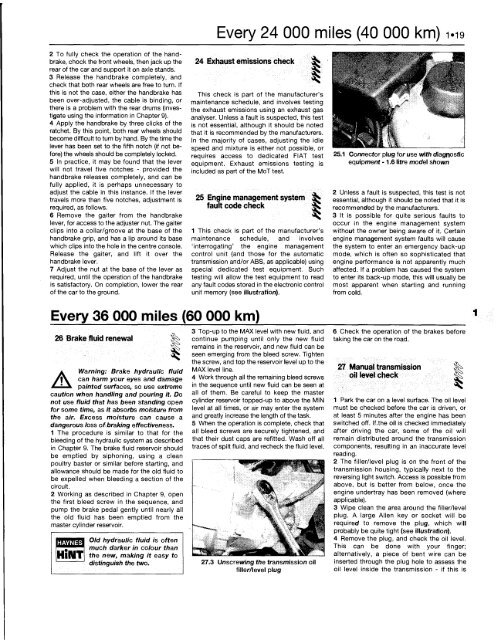
25.1 Connector plug for use with diagnostic<br />
equipment -1.6 litre model shown<br />
2 Unless a fault is suspected, this test is not<br />
essential, although it should be noted that it is<br />
recommended by the manufacturers.<br />
3 It is possible for quite serious faults to<br />
occur in the engine management system<br />
without the owner being aware of it. Certain<br />
engine management system faults will cause<br />
the system to enter an emergency back-up<br />
mode, which is often so sophisticated that<br />
engine performance is not apparently much<br />
affected. If a problem has caused the system<br />
to enter its back-up mode, this will usually be<br />
most apparent when starting and running<br />
from cold.<br />
6 Check the operation of the brakes before<br />
taking the car on the road.<br />
27 Manual transmission<br />
oil level check<br />
1 Park the car on a level surface. The oil level<br />
must be checked before the car is driven, or<br />
at least 5 minutes after the engine has been<br />
switched off. If.the oil is checked immediately<br />
after driving the car, some of the oil will<br />
remain distributed around the transmission<br />
components, resulting in an inaccurate level<br />
reading.<br />
2 The filler/level plug is on the front of the<br />
transmission housing, typically next to the<br />
reversing light switch. Access is possible from<br />
above, but is better from below, once the<br />
engine undertray has been removed (where<br />
applicable).<br />
3 Wipe clean the area around the filler/level<br />
plug. A large Allen key or socket will be<br />
required to remove the plug, which will<br />
probably be quite tight (see illustration).<br />
4 Remove the plug, and check the oil level.<br />
This can be done with your finger;<br />
alternatively, a piece of bent wire can be<br />
inserted through the plug hole to assess the<br />
oil level inside the transmission - if this is


