

Bravo & Brava • 1995 To 2000
Bravo & Brava • 1995 To 2000
Bravo & Brava • 1995 To 2000

Create successful ePaper yourself
Turn your PDF publications into a flip-book with our unique Google optimized e-Paper software.
4.20 Look for cracking between the valve<br />
seats<br />
taking care not to score or gouge them. If<br />
using emery paper, do not use a grade of less<br />
than 100. Turn the head over and using a<br />
blunt blade, scrape any carbon deposits from<br />
the combustion chambers and ports.<br />
Caution: Do not erode the sealing surface<br />
of the valve seat.<br />
17 Finally, wash the entire head casting with<br />
a suitable solvent to remove the remaining<br />
debris.<br />
18 Clean the valve heads and stems using a<br />
fine wire brush. If the valve is heavily coked,<br />
scrape off the majority of the deposits with a<br />
blunt blade first, then use the wire brush.<br />
Caution: Do not erode the sealing surface<br />
of the valve face.<br />
19 Thoroughly clean the remainder of the<br />
components using solvent, and allow them to<br />
dry completely. Discard the oil seals, as new<br />
items must be fitted when the cylinder head is<br />
reassembled.<br />
Inspection<br />
Cylinder head<br />
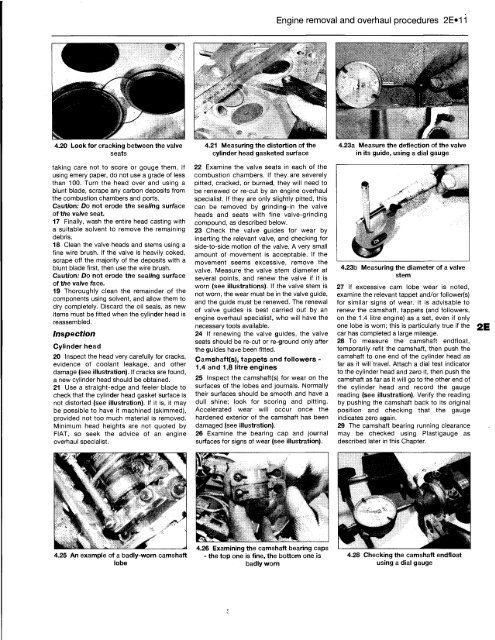
20 Inspect the head very carefully for cracks,<br />
evidence of coolant leakage, and other<br />
damage (see illustration). If cracks are found,<br />
a new cylinder head should be obtained.<br />
21 Use a straight-edge and feeler blade to<br />
check that the cylinder head gasket surface is<br />
not distorted (see illustration). If it is, it may<br />
be possible to have it machined (skimmed),<br />
provided not too much material is removed.<br />
Minimum head heights are not quoted by<br />
FIAT, so seek the advice of an engine<br />
overhaul specialist.<br />
4.25 An example of a badly-worn camshaft<br />
4.21 Measuring the distortion of the<br />
cylinder head gasketed surface<br />
22 Examine the valve seats in each of the<br />
combustion chambers. If they, are severely<br />
pitted, cracked, or burned, they will need to<br />
be renewed or re-cut by an engine overhaul<br />
specialist. If they are only slightly pitted, this<br />
can be removed by grinding-in the valve<br />
heads and seats with fine valve-grinding<br />
compound, as described below.<br />
23 Check the valve guides for wear by<br />
inserting the relevant valve, and checking for<br />
side-to-side motion of the valve. A very small<br />
amount of movement is acceptable. If the<br />
movement seems excessive, remove the<br />
valve. Measure the valve stem diameter at<br />
several points, and renew the valve if it is<br />
worn (see illustrations). If the valve stem is<br />
not worn, the wear must be in the valve guide,<br />
and the guide must be renewed. The renewal<br />
of valve guides is best carried out by an<br />
engine overhaul specialist, who will have the<br />
necessary tools available.<br />
24 If renewing the valve guides, the valve<br />
seats should be re-cut or re-ground only after<br />
the guides have been fitted.<br />
Camshaft(s), tappets and followers -<br />
1.4 and 1.8 litre engines<br />
25 Inspect the camshaft(s) for wear on the<br />
surfaces of the lobes and journals. Normally<br />
their surfaces should be smooth and have a<br />
dull shine; look for scoring and pitting.<br />
Accelerated wear will occur once the<br />
hardened exterior of the camshaft has been<br />
damaged (see illustration).<br />
26 Examine the bearing cap and journal<br />
surfaces for signs of wear (see illustration).<br />
4.26 Examining the camshaft bearing caps<br />
- the top one is fine, the bottom one is<br />
badly worn<br />
Engine removal and overhaul procedures 2E»11<br />
4.23a Measure the deflection of the valve<br />
in its guide, using a dial gauge<br />
4.23b Measuring the diameter of a valve<br />
stem<br />
27 If excessive cam lobe wear is noted,<br />
examine the relevant tappet and/or follower(s)<br />
for similar signs of wear. It is advisable to<br />
renew the camshaft, tappets (and followers,<br />
on the 1.4 litre engine) as a set, even if only<br />
one lobe is worn; this is particularly true if the<br />
car has completed a large mileage.<br />
28 <strong>To</strong> measure the camshaft endfloat,<br />
temporarily refit the camshaft, then push the<br />
camshaft to one end of the cylinder head as<br />
far as it will travel. Attach a dial test indicator<br />
to the cylinder head and zero it, then push the<br />
camshaft as far as it will go to the other end of<br />
the cylinder head and record the gauge<br />
reading (see illustration). Verify the reading<br />
by pushing the camshaft back to its original<br />
position and checking that the gauge<br />
indicates zero again.<br />
29 The camshaft bearing running clearance<br />
may be checked using Plastigauge as<br />
described later in this Chapter.<br />
4.28 Checking the camshaft endfloat<br />
using a dial gauge


