

Bravo & Brava • 1995 To 2000
Bravo & Brava • 1995 To 2000
Bravo & Brava • 1995 To 2000

You also want an ePaper? Increase the reach of your titles
YUMPU automatically turns print PDFs into web optimized ePapers that Google loves.
Try to move the pipes and silencers. If the components<br />
are able to come into contact with the<br />
body or suspension parts, secure the system<br />
with new mountings. Otherwise separate the<br />
joints (if possible) and twist the pipes as<br />
necessary to provide additional clearance.<br />
13 Steering and<br />
suspension check ^<br />
Front suspension<br />
and steering check<br />
1 Raise the front of the vehicle, and securely<br />
support it on axle stands. Where necessary<br />
for improved access, release the fasteners<br />
and remove the engine undertray (where<br />
applicable).<br />
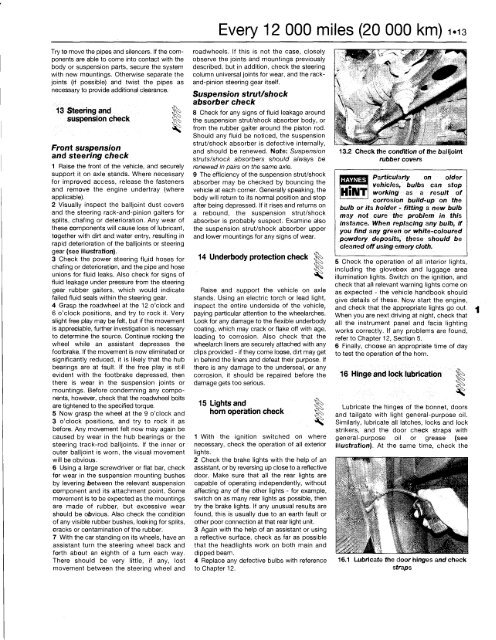
2 Visually inspect the balljoint dust covers<br />
and the steering rack-and-pinion gaiters for<br />
splits, chafing or deterioration. Any wear of<br />
these components will cause loss of lubricant,<br />
together with dirt and water entry, resulting in<br />
rapid deterioration of the balljoints or steering<br />
gear (see illustration).<br />
,3 Check the power steering fluid hoses for<br />
chafing or deterioration, and the pipe and hose<br />
unions for fluid leaks. Also check for signs of<br />
fluid leakage under pressure from the steering<br />
gear rubber gaiters, which would indicate<br />
failed fluid seals within the steering gear.<br />
4 Grasp the roadwheel at the 12 o'clock and<br />
6 o'clock positions, and try to rock it. Very<br />
slight free play may be felt, but if the movement<br />
is appreciable, further investigation is necessary<br />
to determine the source. Continue rocking the<br />
wheel while an assistant depresses the<br />
footbrake. If the movement is now eliminated or<br />
significantly reduced, it is likely that the hub<br />
bearings are at fault. If the free play is still<br />
evident with the footbrake depressed, then<br />
there is wear in the suspension joints or<br />
mountings. Before condemning any components,<br />
however, check that the roadwheel bolts<br />
are tightened to the specified torque.<br />
5 Now grasp the wheel at the 9 o'clock and<br />
3 o'clock positions, and try to rock it as<br />
before. Any movement felt now may again be<br />
caused by wear in the hub bearings or the<br />
steering track-rod balljoints. If the inner or<br />
outer balljoint is worn, the visual movement<br />
will be obvious.<br />
6 Using a large screwdriver or flat bar, check<br />
for wear in the suspension mounting bushes<br />
by levering between the relevant suspension<br />
component and its attachment point. Some<br />
movement is to be expected as the mountings<br />
are made of rubber, but excessive wear<br />
should be obvious. Also check the condition<br />
of any visible rubber bushes, looking for splits,<br />
cracks or contamination of the rubber.<br />
7 With the car standing on its wheels, have an<br />
assistant turn the steering wheel back and<br />
forth about an eighth of a turn each way.<br />
There should be very little, if any, lost<br />
movement between the steering wheel and<br />
Every 12 000 miles (20 000 km) 1.13<br />
roadwheels. If this is not the case, closely<br />
observe the joints- and mountings previously<br />
described, but in addition, check the steering<br />
column universal joints for wear, and the rackand-pinion<br />
steering gear itself.<br />
Suspension strut/shock<br />
absorber check<br />
8 Check for any signs of fluid leakage around<br />
the suspension strut/shock absorber body, or<br />
from the rubber gaiter around the piston rod.<br />
Should any fluid be noticed, the suspension<br />
strut/shock absorber is defective internally,<br />
and should be renewed. Note: Suspension<br />
struts/shock absorbers should always be<br />
renewed in pairs on the same axle.<br />
9 The efficiency of the suspension strut/shock<br />
absorber may be checked by bouncing the<br />
vehicle at each corner. Generally speaking, the<br />
body will return to its normal position and stop<br />
after being depressed. If it rises and returns on<br />
a rebound, the suspension strut/shock<br />
absorber is probably suspect. Examine also<br />
the suspension strut/shock absorber upper<br />
and lower mountings for any signs of wear.<br />
14 Underbody protection check f^><br />
Raise and support the vehicle on axle<br />
stands. Using an electric torch or lead light,<br />
inspect the entire underside of the vehicle,<br />
paying particular attention to the wheelarches.<br />
Look for any damage to the flexible underbody<br />
coating, which may crack or flake off with age,<br />
leading to corrosion. Also check that the<br />
wheelarch liners are securely attached with any<br />
clips provided - if they come loose, dirt may get<br />
in behind the liners and defeat their purpose. If<br />
there is any damage to the underseal, or any<br />
corrosion, it should be repaired before the<br />
damage gets too serious.<br />
15 Lights and f|<br />
horn operation check |k<br />
1 With the ignition switched on where<br />
necessary, check the operation of all exterior<br />
lights.<br />
2 Check the brake lights with the help of an<br />
assistant, or by reversing up close to a reflective<br />
door. Make sure that all the rear lights are<br />
capable of operating independently, without<br />
affecting any of the other lights - for example,<br />
switch on as many rear lights as possible, then<br />
try the brake lights. If any unusual results are<br />
found, this is usually due to an earth fault or<br />
other poor connection at that rear light unit.<br />
3 Again with the help of an assistant or using<br />
a reflective surface, check as far as possible<br />
that the headlights work on both main and<br />
dipped beam.<br />
4 Replace any defective bulbs with reference<br />
to Chapter 12.<br />
13.2 Check the condition of the balljoint<br />
rubber covers<br />
Particularly on older<br />
vehicles, bulbs can stop<br />
^<br />
working<br />
corrosion<br />
as a result<br />
build-up on<br />
of<br />
the<br />
bulb or its holder - fitting a new bulb<br />
may not cure the problem in this<br />
instance. When replacing any bulb, if<br />
you find any green or white-coloured<br />
powdery deposits, these should be<br />
cleaned off using emery cloth.<br />
5 Check the operation of all interior lights,<br />
including the glovebox and luggage area<br />
illumination lights. Switch on the ignition, and<br />
check that all relevant warning lights come on<br />
as expected - the vehicle handbook should<br />
give details of these. Now start the engine,<br />
and check that the appropriate lights go out.<br />
When you are next driving at night, check that<br />
all the instrument panel and facia lighting<br />
works correctly. If any problems are found,<br />
refer to Chapter 12, Section 5.<br />
6 Finally, choose an appropriate time of day<br />
to test the operation of the horn.<br />
16 Hinge and lock lubrication<br />
Lubricate the hinges of the bonnet, doors<br />
and tailgate with light general-purpose oil.<br />
Similarly, lubricate all latches, locks and lock<br />
strikers, and the door check straps with<br />
general-purpose oil or grease (see<br />
illustration). At the same time, check the<br />
16.1 Lubricate the door hinges and check<br />
straps


