

Bravo & Brava • 1995 To 2000
Bravo & Brava • 1995 To 2000
Bravo & Brava • 1995 To 2000

You also want an ePaper? Increase the reach of your titles
YUMPU automatically turns print PDFs into web optimized ePapers that Google loves.
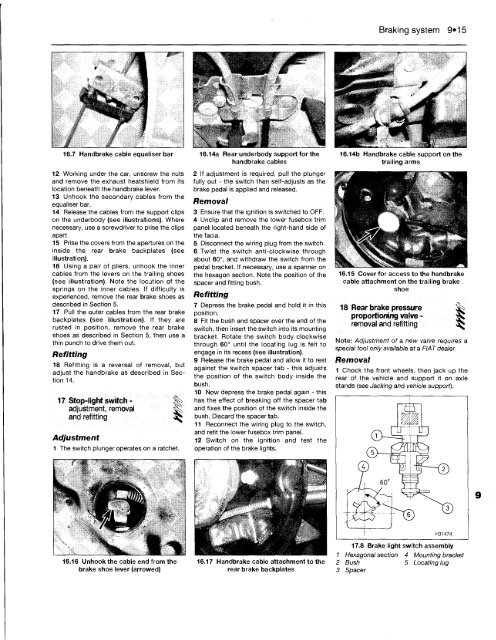
16.7 Handbrake cable equaliser bar<br />
12 Working under the car, unscrew the nuts<br />
and remove the exhaust heatshield from its<br />
location beneath the handbrake lever.<br />
13 Unhook the secondary cables from the<br />
equaliser bar.<br />
14 Release the cables from the support clips<br />
on the underbody (see illustrations). Where<br />
necessary, use a screwdriver to prise the clips<br />
apart.<br />
15 Prise the covers from the apertures on the<br />
inside the rear brake backplates (see<br />
illustration).<br />
16 Using a pair of pliers, unhook the inner<br />
cables from the levers on the trailing shoes<br />
(see illustration). Note the location of the<br />
springs on the inner cables. If difficulty is<br />
experienced, remove the rear brake shoes as<br />
described in Section 5.<br />
17 Pull the outer cables from the rear brake<br />
backplates (see illustration). If they are<br />
rusted in position, remove the rear brake<br />
shoes as described in Section 5, then use a<br />
thin punch to drive them out.<br />
Refitting<br />
18 Refitting is a reversal of removal, but<br />
adjust the handbrake as described in Section<br />
14.<br />
17 Stop-light switch -<br />
adjustment, removal<br />
and refitting<br />
Adjustment<br />
1<br />
1 The switch plunger operates on a ratchet.<br />
16.16 Unhook the cable end from the<br />
brake shoe lever (arrowed)<br />
16.14a Rear underbody support for the<br />
handbrake cables<br />
2 If adjustment is required, pull the plunger<br />
fully out - the switch then self-adjusts as the<br />
brake pedal is applied and released.<br />
Removal<br />
3 Ensure that the ignition is switched to OFF.<br />
4 Unclip and remove the lower fusebox trim<br />
panel located beneath the right-hand side of<br />
the facia.<br />
5 Disconnect the wiring plug from the switch.<br />
6 Twist the switch anti-clockwise through<br />
about 60°, and withdraw the switch from the<br />
pedal bracket. If necessary, use a spanner on<br />
the hexagon section. Note the position of the<br />
spacer and fitting bush.<br />
Refitting<br />
7 Depress the brake pedal and hold it in this<br />
position.<br />
8 Fit the bush and spacer over the end of the<br />
switch, then insert the switch into its mounting<br />
bracket. Rotate the switch body clockwise<br />
through 60° until the locating lug is felt to<br />
engage in its recess (see illustration).<br />
9 Release the brake pedal and allow it to rest<br />
against the switch spacer tab - this adjusts<br />
the position of the switch body inside the<br />
bush.<br />
10 Now depress the brake pedal again - this<br />
has the effect of breaking off the spacer tab<br />
and fixes the position of the switch inside the<br />
bush. Discard the spacer tab.<br />
11 Reconnect the wiring plug to the switch,<br />
and refit the lower fusebox trim panel.<br />
12 Switch on the ignition and test the<br />
operation of the brake lights.<br />
16.17 Handbrake cable attachment to the<br />
rear brake backplates<br />
Braking system 9*15<br />
16.14b Handbrake cable support on the<br />
trailing arms<br />
16.15 Cover for access to the handbrake<br />
cable attachment on the trailing brake<br />
shoe<br />
18 Rear brake pressure<br />
proportioning valve -<br />
removal and refitting<br />
Note: Adjustment of a new valve requires a<br />
special tool only available at a FIAT dealer.<br />
Removal<br />
1 Chock the front wheels, then jack up the<br />
rear of the vehicle and support it on axle<br />
stands (see Jacking and vehicle support).<br />
17.8 Brake light switch assembly<br />
1 Hexagonal section 4 Mounting bracket<br />
2 Bush 5 Locating lug<br />
3 Spacer


