

Bravo & Brava • 1995 To 2000
Bravo & Brava • 1995 To 2000
Bravo & Brava • 1995 To 2000

Create successful ePaper yourself
Turn your PDF publications into a flip-book with our unique Google optimized e-Paper software.
12*10 Body electrical systems<br />
the front of the car and release the outer<br />
location ball from its socket with a suitable<br />
lever (see illustrations).<br />
Refitting<br />
4 Refitting is a reversal of removal, but align<br />
the upper mounting bolts with the previouslymade<br />
marks before tightening them. Finally,<br />
have the headlight beam alignment checked<br />
with reference to Section 8.<br />
Front direction indicator side<br />
repeater light<br />
5 The procedure is described as part of the<br />
bulb renewal procedure in Section 4.<br />
Front foglight<br />
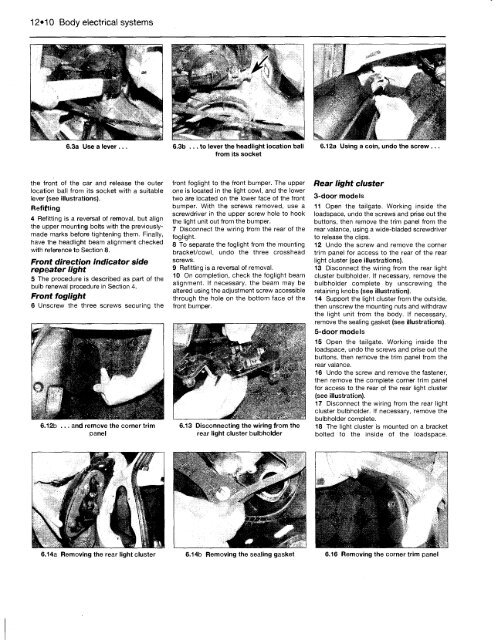
6 Unscrew the three screws securing the<br />
6.12b ... and remove the corner trim<br />
panel<br />
front foglight to the front bumper. The upper<br />
one is located in the light cowl, and the lower<br />
two are located on the lower face of the front<br />
bumper. With the screws removed, use a<br />
screwdriver in the upper screw hole to hook<br />
the light unit out from the bumper.<br />
7 Disconnect the wiring from the rear of the<br />
foglight.<br />
8 <strong>To</strong> separate the foglight from the mounting<br />
bracket/cowl, undo the three crosshead<br />
screws.<br />
9 Refitting is a reversal of removal.<br />
10 On completion, check the foglight beam<br />
alignment. If necessary, the beam may be<br />
altered using the adjustment screw accessible<br />
through the hole on the bottom face of the<br />
front bumper.<br />
6.13 Disconnecting the wiring from the<br />
rear light cluster bulbholder<br />
Rear light cluster<br />
3-door models<br />
11 Open the tailgate. Working inside the<br />
loadspace, undo the screws and prise out the<br />
buttons, then remove the trim panel from the<br />
rear valance, using a wide-bladed screwdriver<br />
to release the clips.<br />
12 Undo the screw and remove the corner<br />
trim panel for access to the rear of the rear<br />
light cluster (see illustrations).<br />
13 Disconnect the wiring from the rear light<br />
cluster bulbholder. If necessary, remove the<br />
bulbholder complete by unscrewing the<br />
retaining knobs (see illustration).<br />
14 Support the light cluster from the outside,<br />
then unscrew the mounting nuts and withdraw<br />
the light unit from the body. If necessary,<br />
remove the sealing gasket (see illustrations).<br />
5-door models<br />
15 Open the tailgate. Working inside the<br />
loadspace, undo the screws and prise out the<br />
buttons, then remove the trim panel from the<br />
rear valance.<br />
16 Undo the screw and remove the fastener,<br />
then remove the complete corner trim panel<br />
for access to the rear of the rear light cluster<br />
(see illustration).<br />
17 Disconnect the wiring from the rear light<br />
cluster bulbholder. If necessary, remove the<br />
bulbholder complete.<br />
18 The light cluster is mounted on a bracket<br />
bolted to the inside of the loadspace.<br />
6.14a Removing the rear light cluster 6.14b Removing the sealing gasket 6.16 Removing the corner trim panel


