

Bravo & Brava • 1995 To 2000
Bravo & Brava • 1995 To 2000
Bravo & Brava • 1995 To 2000

You also want an ePaper? Increase the reach of your titles
YUMPU automatically turns print PDFs into web optimized ePapers that Google loves.
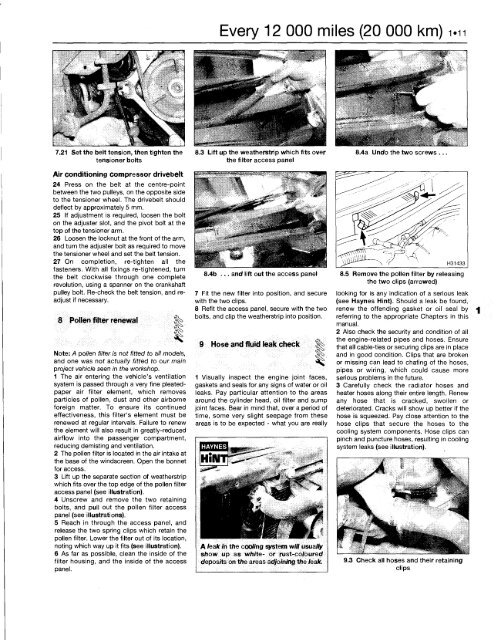
7.21 Set the belt tension, then tighten the 8.3 Lift up the weatherstrip which fits over<br />
tensioner bolts the filter access panel<br />
Air conditioning compressor drivebelt<br />
24 Press on the belt at the centre-point<br />
between the two pulleys, on the opposite side<br />
to the tensioner wheel. The drivebelt should<br />
deflect by approximately 5 mm.<br />
25 If adjustment is required, loosen the bolt<br />
on the adjuster slot, and the pivot bolt at the<br />
top of the tensioner arm.<br />
26 Loosen the locknut at the front of the arm,<br />
and turn the adjuster bolt as required to move<br />
the tensioner wheel and set the belt tension.<br />
27 On completion, re-tighten all the<br />
fasteners. With all fixings re-tightened, turn<br />
the belt clockwise through one complete<br />
revolution, using a spanner on the crankshaft<br />
pulley bolt. Re-check the belt tension, and readjust<br />
if necessary.<br />
8 Pollen filter renewal<br />
Note: A pollen filter is not fitted to all models,<br />
and one was not actually fitted to our main<br />
project vehicle seen in the workshop.<br />
1 The air entering the vehicle's ventilation<br />
system is passed through a very fine pleatedpaper<br />
air filter element, which removes<br />
particles of pollen, dust and other airborne<br />
foreign matter. <strong>To</strong> ensure its continued<br />
effectiveness, this filter's element must be<br />
renewed at regular intervals. Failure to renew<br />
the element will also result in greatly-reduced<br />
airflow into the passenger compartment,<br />
reducing demisting and ventilation.<br />
2 The pollen filter is located in the air intake at<br />
the base of the windscreen. Open the bonnet<br />
for access.<br />
3 Lift up the separate section of weatherstrip<br />
which fits over the top edge of the pollen filter<br />
access panel (see illustration).<br />
4 Unscrew and remove the two retaining<br />
bolts, and pull out the pollen filter access<br />
panel (see illustrations).<br />
5 Reach in through the access panel, and<br />
release the two spring clips which retain the<br />
pollen filter. Lower the filter out of its location,<br />
noting which way up it fits (see illustration).<br />
6 As far as possible, clean the inside of the<br />
filter housing, and the inside of the access<br />
panel.<br />
Every 12 000 miles (20 000 km) L H<br />
8.4b ... and lift out the access panel<br />
7 Fit the new filter into position, and secure<br />
with the two clips.<br />
8 Refit the access panel, secure with the two<br />
bolts, and clip the weatherstrip into position.<br />
9 Hose and fluid leak check<br />
1 Visually inspect the engine joint faces,<br />
gaskets and seals for any signs of water or oil<br />
leaks. Pay particular attention to the areas<br />
around the cylinder head, oil filter and sump<br />
joint faces. Bear in mind that, over a period of<br />
time, some very slight seepage from these<br />
areas is to be expected - what you are really<br />
HAYNES<br />
A leak in the cooling system will usually<br />
show up as white- or rust-coloured<br />
deposits on the areas adjoining the leak.<br />
8.4a Undo the two screws .<br />
8.5 Remove the pollen filter by releasing<br />
the two clips (arrowed)<br />
looking for is any indication of a serious leak<br />
(see Haynes Hint). Should a leak be found,<br />
renew the offending gasket or oil seal by<br />
referring to the appropriate Chapters in this<br />
manual.<br />
2 Also check the security and condition of all<br />
the engine-related pipes and hoses. Ensure<br />
that all cable-ties or securing clips are in place<br />
and in good condition. Clips that are broken<br />
or missing can lead to chafing of the hoses,<br />
pipes or wiring, which could cause more<br />
serious problems in the future.<br />
3 Carefully check the radiator hoses and<br />
heater hoses along their entire length. Renew<br />
any hose that is cracked, swollen or<br />
deteriorated. Cracks will show up better if the<br />
hose is squeezed. Pay close attention to the<br />
hose clips that secure the hoses to the<br />
cooling system components. Hose clips can<br />
pinch and puncture hoses, resulting in cooling<br />
system leaks (see illustration).<br />
9.3 Check all hoses and their retaining<br />
clips


