

Bravo & Brava • 1995 To 2000
Bravo & Brava • 1995 To 2000
Bravo & Brava • 1995 To 2000

Create successful ePaper yourself
Turn your PDF publications into a flip-book with our unique Google optimized e-Paper software.
36 Unbolt and remove the timing belt guard<br />
brackets from over the coolant pump. One is<br />
located on the rear of the engine and the other<br />
is located below the exhaust camshaft<br />
sprocket.<br />
37 Unscrew the mounting bolts and withdraw<br />
the coolant pump from the cylinder head.<br />
Recover the O-ring seal.<br />
Inspection<br />
38 Check the pump body and impeller for<br />
signs of excessive corrosion. Turn the impeller,<br />
and check for stiffness due to corrosion, or<br />
roughness due to excessive end play.<br />
39 On 1.6 litre engines, check the clearance<br />
between the pump impeller and the casing.<br />
Either use vernier calipers to calculate the<br />
clearance, or use a feeler blade inserted<br />
through the aperture at the rear of the pump<br />
housing. If the clearance is different to that<br />
given in the Specifications, the pump must be<br />
renewed.<br />
Refitting<br />
40 Commence refitting by thoroughly<br />
cleaning the mating faces of the pump and<br />
cylinder block/head/housing.<br />
1.2 litre models<br />
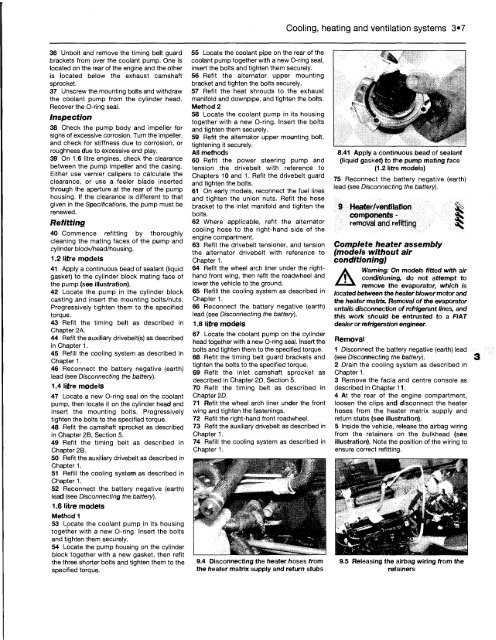
41 Apply a continuous bead of sealant (liquid<br />
gasket) to the cylinder block mating face of<br />
the pump (see illustration).<br />
42 Locate the pump in the cylinder block<br />
casting and insert the mounting bolts/nuts.<br />
Progressively tighten them to the specified<br />
torque.<br />
43 Refit the timing belt as described in<br />
Chapter 2A.<br />
44 Refit the auxiliary drivebelt(s) as described<br />
in Chapter 1.<br />
45 Refill the cooling system as described in<br />
Chapter 1.<br />
46 Reconnect the battery negative (earth)<br />
lead (see Disconnecting the battery).<br />
1.4 litre models<br />
47 Locate a new O-ring seal on the coolant<br />
pump, then locate it on the cylinder head and<br />
insert the mounting bolts. Progressively<br />
tighten the bolts to the specified torque.<br />
48 Refit the camshaft sprocket as described<br />
in Chapter 2B, Section 5.<br />
49 Refit the timing belt as described in<br />
Chapter 2B.<br />
50 Refit the auxiliary drivebelt as described in<br />
Chapter 1.<br />
51 Refill the cooling system as described in<br />
Chapter 1.<br />
52 Reconnect the battery negative (earth)<br />
lead (see Disconnecting the battery).<br />
1.6 litre models<br />
Method 1<br />
53 Locate the coolant pump in its housing<br />
together with a new O-ring. Insert the bolts<br />
and tighten them securely.<br />
54 Locate the pump housing on the cylinder<br />
block together with a new gasket, then refit<br />
the three shorter bolts and tighten them to the<br />
specified torque.<br />
55 Locate the coolant pipe on the rear of the<br />
coolant pump together with a new O-ring seal,<br />
insert the bolts and tighten them securely.<br />
56 Refit the alternator upper mounting<br />
bracket and tighten the bolts securely.<br />
57 Refit the heat shrouds to the exhaust<br />
manifold and downpipe, and tighten the bolts.<br />
Method 2<br />
58 Locate the coolant pump in its housing<br />
together with a new O-ring. Insert the bolts<br />
and tighten them securely.<br />
59 Refit the alternator upper mounting bolt,<br />
tightening it securely.<br />
All methods<br />
60 Refit the power steering pump and<br />
tension the drivebelt with reference to<br />
Chapters 10 and 1. Refit the drivebelt guard<br />
and tighten the bolts.<br />
61 On early models, reconnect the fuel lines<br />
and tighten the union nuts. Refit the hose<br />
bracket to the inlet manifold and tighten the<br />
bolts.<br />
62 Where applicable, refit the alternator<br />
cooling hose to the right-hand side of the<br />
engine compartment.<br />
63 Refit the drivebelt tensioner, and tension<br />
the alternator drivebelt with reference to<br />
Chapter 1.<br />
64 Refit the wheel arch liner under the righthand<br />
front wing, then refit the roadwheel and<br />
lower the vehicle to the ground.<br />
65 Refill the cooling system as described in<br />
Chapter 1.<br />
66 Reconnect the battery negative (earth)<br />
lead (see Disconnecting the battery).<br />
1.8 litre models<br />
67 Locate the coolant pump on the cylinder<br />
head together with a new O-ring seal. Insert the<br />
bolts and tighten them to the specified torque.<br />
68 Refit the timing belt guard brackets and<br />
tighten the bolts to the specified torque.<br />
69 Refit the inlet camshaft sprocket as<br />
described in Chapter 2D, Section 5.<br />
70 Refit the timing belt as described in<br />
Chapter 2D.<br />
71 Refit the wheel arch liner under the front<br />
wing and tighten the fastenings.<br />
72 Refit the right-hand front roadwheel.<br />
73 Refit the auxiliary drivebelt as described in<br />
Chapter 1.<br />
74 Refill the cooling system as described in<br />
Chapter 1.<br />
9.4 Disconnecting the heater hoses from<br />
the heater matrix supply and return stubs<br />
Cooling, heating and ventilation systems 3*7<br />
8.41 Apply a continuous bead of sealant<br />
(liquid gasket) to the pump mating face<br />
(1.2 litre models)<br />
75 Reconnect the battery negative (earth)<br />
lead (see Disconnecting the battery).<br />
9 Heater/ventilation<br />
components -<br />
removal and refitting<br />
Complete heater assembly<br />
(models without air<br />
conditioning)<br />
A<br />
Warning: On models fitted with air<br />
conditioning, do not attempt to<br />
remove the evaporator, which is<br />
located between the heater blower motor and<br />
the heater matrix. Removal of the evaporator<br />
entails disconnection of refrigerant lines, and<br />
this work should be entrusted to a FIAT<br />
dealer or refrigeration engineer.<br />
Removal<br />
1 Disconnect the battery negative (earth) lead<br />
(see Disconnecting the battery).<br />
2 Drain the cooling system as described in<br />
Chapter 1.<br />
3 Remove the facia and centre console as<br />
described in Chapter 11.<br />
4 At the rear of the engine compartment,<br />
loosen the clips and disconnect the heater<br />
hoses from the heater matrix supply and<br />
return stubs (see illustration).<br />
5 Inside the vehicle, release the airbag wiring<br />
from the retainers on the bulkhead (see<br />
illustration). Note the position of the wiring to<br />
ensure correct refitting.<br />
9.5 Releasing the airbag wiring from the<br />
retainers


