

Bravo & Brava • 1995 To 2000
Bravo & Brava • 1995 To 2000
Bravo & Brava • 1995 To 2000

Create successful ePaper yourself
Turn your PDF publications into a flip-book with our unique Google optimized e-Paper software.
11*16 Bodywork and fittings<br />
18.23a Unscrew the mounting nuts ...<br />
23 Unscrew the 5 regulator mounting nuts,<br />
then withdraw the regulator through the<br />
aperture in the door inner panel (see<br />
illustrations).<br />
Refitting<br />
24 Refitting is a reversal of removal.<br />
19 Seats - §|<br />
removal and refitting ^<br />
Front seats<br />
Removal<br />
1 On models fitted with a side airbag and<br />
presence sensor in the front passenger seat,<br />
disconnect the battery (see Disconnecting the<br />
battery) then wait approximately 10 minutes<br />
before proceeding. This is necessary to<br />
ensure the airbag system is completely<br />
deactivated and safe.<br />
2 The front seats are secured to the floorpan<br />
by four bolts. First, adjust the seat towards<br />
the rear of the car to gain access to the two<br />
bolts at the front, then unscrew and remove<br />
them (see illustration).<br />
3 Adjust the seat fully forwards, then unscrew<br />
and remove the two rearmost bolts (see<br />
illustration).<br />
4 Tilt the seat backwards for access to its<br />
underside. As applicable, disconnect the<br />
wiring from the seat heater, lumbar adjuster,<br />
and side airbag. Prise off the safety cap and<br />
19.2 Unscrewing the front mounting bolts<br />
from the front seat<br />
18.23b ... and withdraw the regulator<br />
through the aperture in the door inner<br />
panel<br />
remove the connector flap, then disconnect<br />
the wiring.<br />
5 Lift the seat out of the passenger area. Do<br />
not lift on the adjustment bar, otherwise the<br />
seat runners may be misaligned.<br />
Refitting<br />
6 Refitting is a reversal of removal. Note that<br />
the location pin on the rear of the mounting<br />
runner engages with a hole in the floor (see<br />
illustration). When reconnecting the battery<br />
on models with a side airbag and presence<br />
sensor, ensure there is no one inside the<br />
vehicle, as a precaution against accidental<br />
activation of the airbag. With the driver's door<br />
open, reach inside and turn on the ignition,<br />
then check the operation of the airbag<br />
warning light.<br />
Rear seat backrest<br />
Removal<br />
7 Lower the rear seat backrest onto the<br />
cushion, then undo the row of screws<br />
securing the luggage compartment floor<br />
covering to the bottom of the backrest.<br />
Carefully prise out the buttons and fold back<br />
the floor covering.<br />
8 At the outer lower corners, undo the two<br />
screws on each side securing the backrest to<br />
the brackets.<br />
9 Lift the backrest from the passenger area.<br />
Refitting<br />
10 Refitting is a reversal of removal.<br />
19.3 Unscrewing the rear mounting bolts<br />
from the front seat<br />
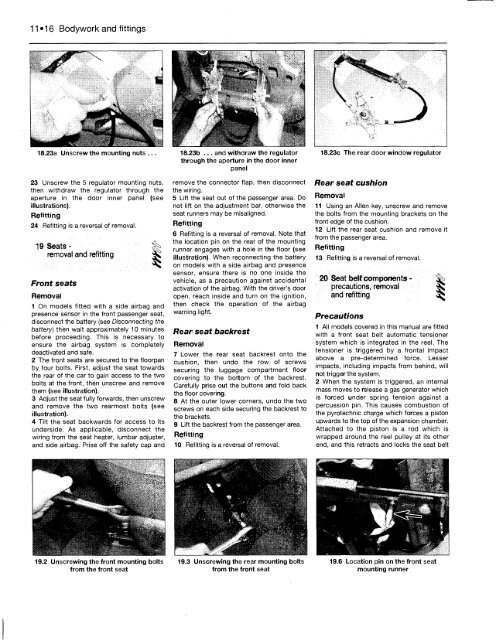
18.23c The rear door window regulator<br />
Rear seat cushion<br />
Removal<br />
11 Using an Allen key, unscrew and remove<br />
the bolts from the mounting brackets on the<br />
front edge of the cushion.<br />
12 Lift the rear seat cushion and remove it<br />
from the passenger area.<br />
Refitting<br />
13 Refitting is a reversal of removal.<br />
20 Seat belt components - ^<br />
precautions, removal *I<br />
and refitting >^<br />
Precautions<br />
1 All models covered in this manual are fitted<br />
with a front seat belt automatic tensioner<br />
system which is integrated in the reel. The<br />
tensioner is triggered by a frontal impact<br />
above a pre-determined force. Lesser<br />
impacts, including impacts from behind, will<br />
not trigger the system.<br />
2 When the system is triggered, an internal<br />
mass moves to release a gas generator which<br />
is forced under spring tension against a<br />
percussion pin. This causes combustion of<br />
the pyrotechnic charge which forces a piston<br />
upwards to the top of the expansion chamber.<br />
Attached to the piston is a rod which is<br />
wrapped around the reel pulley at its other<br />
end, and this retracts and locks the seat belt<br />
19.6 Location pin on the front seat<br />
mounting runner


