

Bravo & Brava • 1995 To 2000
Bravo & Brava • 1995 To 2000
Bravo & Brava • 1995 To 2000

Create successful ePaper yourself
Turn your PDF publications into a flip-book with our unique Google optimized e-Paper software.
1.12 Every 12 000 miles (20 000 km)<br />
4 Inspect all the cooling system components<br />
(hoses, joint faces etc.) for leaks. A leak in the<br />
cooling system will usually show up as whiteor<br />
rust-coloured deposits on the area<br />
adjoining the leak. Where any problems of this<br />
nature are found on system components,<br />
renew the component or gasket with<br />
reference to Chapter 3.<br />
5 Where applicable, inspect the automatic<br />
transmission fluid cooler hoses for leaks or<br />
deterioration.<br />
6 With the vehicle raised, inspect the fuel<br />
tank and filler neck for punctures, cracks and<br />
other damage. The connection between the<br />
filler neck and tank is especially critical.<br />
Sometimes a rubber filler neck or connecting<br />
hose will leak due to loose retaining clamps or<br />
deteriorated rubber.<br />
7 Carefully check all rubber hoses and metal<br />
fuel lines leading away from the fuel tank.<br />
Check for loose connections, deteriorated<br />
hoses, crimped lines, and other damage. Pay<br />
particular attention to the vent pipes and<br />
hoses, which often loop up around the filler<br />
neck and can become blocked or crimped.<br />
Follow the lines to the front of the vehicle,<br />
carefully inspecting them all the way. Renew<br />
damaged sections as necessary.<br />
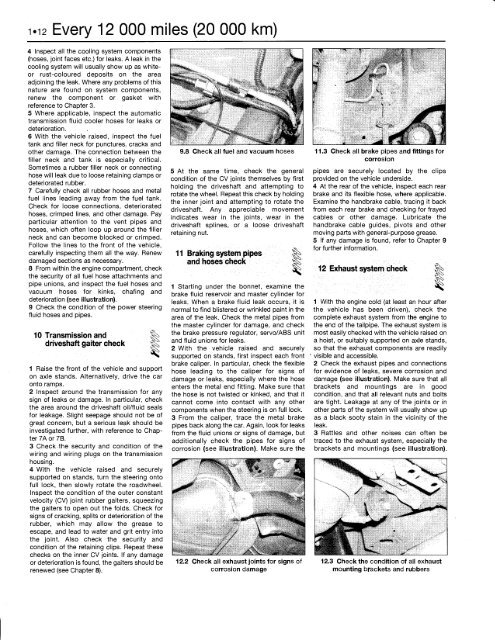
8 From within the engine compartment, check<br />
the security of all fuel hose attachments and<br />
pipe unions, and inspect the fuel hoses and<br />
vacuum hoses for kinks, chafing and<br />
deterioration (see illustration).<br />
9 Check the condition of the power steering<br />
fluid hoses and pipes.<br />
10 Transmission and<br />
driveshaft gaiter check I<br />
1 Raise the front of the vehicle and support<br />
on axle stands. Alternatively, drive the car<br />
onto ramps.<br />
2 Inspect around the transmission for any<br />
sign of leaks or damage. In particular, check<br />
the area around the driveshaft oil/fluid seals<br />
for leakage. Slight seepage should not be of<br />
great concern, but a serious leak should be<br />
investigated further, with reference to Chapter<br />
7A or 7B.<br />
3 Check the security and condition of the<br />
wiring and wiring plugs on the transmission<br />
housing.<br />
4 With the vehicle raised and securely<br />
supported on stands, turn the steering onto<br />
full lock, then slowly rotate the roadwheel.<br />
Inspect the condition of the outer constant<br />
velocity (CV) joint rubber gaiters, squeezing<br />
the gaiters to open out the folds. Check for<br />
signs of cracking, splits or deterioration of the<br />
rubber, which may allow the grease to<br />
escape, and lead to water and grit entry into<br />
the joint. Also check the security and<br />
condition of the retaining clips. Repeat these<br />
checks on the inner CV joints. If any damage<br />
or deterioration is found, the gaiters should be<br />
renewed (see Chapter 8).<br />
9.8 Check all fuel and vacuum hoses<br />
5 At the same time, check the general<br />
condition of the CV joints themselves by first<br />
holding the driveshaft and attempting to<br />
rotate the wheel. Repeat this check by holding<br />
the inner joint and attempting to rotate the<br />
driveshaft. Any appreciable movement<br />
indicates wear in the joints, wear in the<br />
driveshaft splines, or a loose driveshaft<br />
retaining nut.<br />
11 Braking system pipes<br />
and hoses check<br />
1 Starting under the bonnet, examine the<br />
brake fluid reservoir and master cylinder for<br />
leaks. When a brake fluid leak occurs, it is<br />
normal to find blistered or wrinkled paint in the<br />
area of the leak. Check the metal pipes from<br />
the master cylinder for damage, and check<br />
the brake pressure regulator, servo/ABS unit<br />
and fluid unions for leaks.<br />
2 With the vehicle raised and securely<br />
supported on stands, first inspect each front<br />
brake caliper. In particular, check the flexible<br />
hose leading to the caliper for signs of<br />
damage or leaks, especially where the hose<br />
enters the metal end fitting. Make sure that<br />
the hose is not twisted or kinked, and that it<br />
cannot come into contact with any other<br />
components when the steering is on full lock.<br />
3 From the caliper, trace the metal brake<br />
pipes back along the car. Again, look for leaks<br />
from the fluid unions or signs of damage, but<br />
additionally check the pipes for signs of<br />
corrosion (see illustration). Make sure the<br />
12.2 Check all exhaust joints for signs of<br />
corrosion damage<br />
11.3 Check all brake pipes and fittings for<br />
corrosion<br />
pipes are securely located by the clips<br />
provided on the vehicle underside.<br />
4 At the rear of the vehicle, inspect each rear<br />
brake and its flexible hose, where applicable.<br />
Examine the handbrake cable, tracing it back<br />
from each rear brake and checking for frayed<br />
cables or other damage. Lubricate the<br />
handbrake cable guides, pivots and other<br />
moving parts with general-purpose grease.<br />
5 If any damage is found, refer to Chapter 9<br />
for further information.<br />
12 Exhaust system check<br />
1 With the engine cold (at least an hour after<br />
the vehicle has been driven), check the<br />
complete exhaust system from the engine to<br />
the end of the tailpipe. The exhaust system is<br />
most easily checked with the vehicle raised on<br />
a hoist, or suitably supported on axle stands,<br />
so that the exhaust components are readily<br />
visible and accessible.<br />
2 Check the exhaust pipes and connections<br />
for evidence of leaks, severe corrosion and<br />
damage (see illustration). Make sure that all<br />
brackets and mountings are in good<br />
condition, and that all relevant nuts and bolts<br />
are tight. Leakage at any of the joints or in<br />
other parts of the system will usually show up<br />
as a black sooty stain in the vicinity of the<br />
leak.<br />
3 Rattles and other noises can often be<br />
traced to the exhaust system, especially the<br />
brackets and mountings (see illustration).<br />
12.3 Check the condition of all exhaust<br />
mounting brackets and rubbers<br />
|


