

Bravo & Brava • 1995 To 2000
Bravo & Brava • 1995 To 2000
Bravo & Brava • 1995 To 2000

You also want an ePaper? Increase the reach of your titles
YUMPU automatically turns print PDFs into web optimized ePapers that Google loves.
1.22 Every 2 years<br />
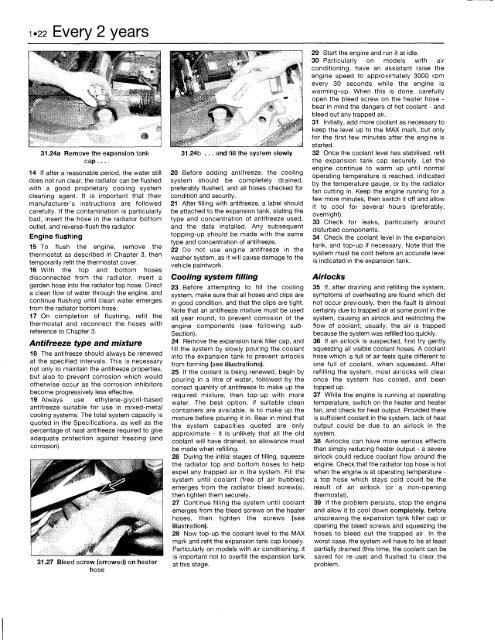
31.24a Remove the expansion tank<br />
cap...<br />
14 If after a reasonable period, the water still<br />
does not run clear, the radiator can be flushed<br />
with a good proprietary cooling system<br />
cleaning agent. It is important that their<br />
manufacturer's instructions are followed<br />
carefully. If the contamination is particularly<br />
bad, insert the hose in the radiator bottom<br />
outlet, and reverse-flush the radiator.<br />
Engine flushing<br />
15 <strong>To</strong> flush the engine, remove the<br />
thermostat as described in Chapter 3, then<br />
temporarily refit the thermostat cover.<br />
16 With the top and bottom hoses<br />
disconnected from the radiator, insert a<br />
garden hose into the radiator top hose. Direct<br />
a clean flow of water through the engine, and<br />
continue flushing until clean water emerges<br />
from the radiator bottom hose.<br />
17 On completion of flushing, refit the<br />
thermostat and reconnect the hoses with<br />
reference to Chapter 3.<br />
Antifreeze type and mixture<br />
18 The antifreeze should always be renewed<br />
at the specified intervals. This is necessary<br />
not only to maintain the antifreeze properties,<br />
but also to prevent corrosion which would<br />
otherwise occur as the corrosion inhibitors<br />
become progressively less effective.<br />
19 Always use ethylene-glycol-based<br />
antifreeze suitable for use in mixed-metal<br />
cooling systems. The total system capacity is<br />
quoted in the Specifications, as well as the<br />
percentage of neat antifreeze required to give<br />
adequate protection against freezing (and<br />
corrosion).<br />
31.27 Bleed screw (arrowed) on heater<br />
hose<br />
31.24b ... and fill the system slowly<br />
20 Before adding antifreeze, the cooling<br />
system should be completely drained,<br />
preferably flushed, and all hoses checked for<br />
condition and security.<br />
21 After filling with antifreeze, a label should<br />
be attached to the expansion tank, stating the<br />
type and concentration of antifreeze used,<br />
and the date installed. Any subsequent<br />
topping-up should be made with the same<br />
type and concentration of antifreeze.<br />
22 Do not use engine antifreeze in the<br />
washer system, as it will cause damage to the<br />
vehicle paintwork.<br />
Cooling system filling<br />
23 Before attempting to fill the cooling<br />
system, make sure that all hoses and clips are<br />
in good condition, and that the clips are tight.<br />
Note that an antifreeze mixture must be used<br />
all year round, to prevent corrosion of the<br />
engine components (see following sub-<br />
Section).<br />
24 Remove the expansion tank filler cap, and<br />
fill the system by slowly pouring the coolant<br />
into the expansion tank to prevent airlocks<br />
from forming (see illustrations).<br />
25 If the coolant is being renewed, begin by<br />
pouring in a litre of water, followed by the<br />
correct quantity of antifreeze to make up the<br />
required mixture, then top-up with more<br />
water. The best option, if suitable clean<br />
containers are available, is to make up the<br />
mixture before pouring it in. Bear in mind that<br />
the system capacities quoted are only<br />
approximate - it is unlikely that all the old<br />
coolant will have drained, so allowance must<br />
be made when refilling.<br />
26 During the initial stages of filling, squeeze<br />
the radiator top and bottom hoses to help<br />
expel any trapped air in the system. Fill the<br />
system until coolant (free of air bubbles)<br />
emerges from the radiator bleed screw(s),<br />
then tighten them securely.<br />
27 Continue filling the system until coolant<br />
emerges from the bleed screws on the heater<br />
hoses, then tighten the screws (see<br />
illustration).<br />
28 Now top-up the coolant level to the MAX<br />
mark and refit the expansion tank cap loosely.<br />
Particularly on models with air conditioning, it<br />
is important not to overfill the expansion tank<br />
at this stage.<br />
29 Start the engine and run it at idle.<br />
30 Particularly on models with air<br />
conditioning, have an assistant raise the<br />
engine speed to approximately 3000 rpm<br />
every 30 seconds while the engine is<br />
warming-up. When this is done, carefully<br />
open the bleed screw on the heater hose -<br />
bear in mind the dangers of hot coolant - and<br />
bleed out any trapped air.<br />
31 Initially, add more coolant as necessary to<br />
keep the level up to the MAX mark, but only<br />
for the first few minutes after the engine is<br />
started.<br />
32 Once the coolant level has stabilised, refit<br />
the expansion tank cap securely. Let the<br />
engine continue to warm up until normal<br />
operating temperature is reached, indicated<br />
by the temperature gauge, or by the radiator<br />
fan cutting in. Keep the engine running for a<br />
few more minutes, then switch it off and allow<br />
it to cool for several hours (preferably,<br />
overnight).<br />
33 Check for leaks, particularly around<br />
disturbed components.<br />
34 Check the coolant level in the expansion<br />
tank, and top-up if necessary. Note that the<br />
system must be cold before an accurate level<br />
is indicated in the expansion tank.<br />
Airlocks<br />
35 If, after draining and refilling the system,<br />
symptoms of overheating are found which did<br />
not occur previously, then the fault is almost<br />
certainly due to trapped air at some point in the<br />
system, causing an airlock and restricting the<br />
flow of coolant; usually, the air is trapped<br />
because the system was refilled too quickly.<br />
36 If an-airlock is suspected, first try gently<br />
squeezing all visible coolant hoses. A coolant<br />
hose which is full of air feels quite different to<br />
one full of coolant, when squeezed. After<br />
refilling the system, most airlocks will clear<br />
once the system has cooled, and been<br />
topped up.<br />
37 While the engine is running at operating<br />
temperature, switch on the heater and heater<br />
fan, and check for heat output. Provided there<br />
is sufficient coolant in the system, lack of heat<br />
output could be due to an airlock in the<br />
system.<br />
38 Airlocks can have more serious effects<br />
than simply reducing heater output - a severe<br />
airlock could reduce coolant flow around the<br />
engine. Check that the radiator top hose is hot<br />
when the engine is at operating temperature -<br />
a top hose which stays cold could be the<br />
result of an airlock (or a non-opening<br />
thermostat).<br />
39 If the problem persists, stop the engine<br />
and allow it to cool down completely, before<br />
unscrewing the expansion tank filler cap or<br />
opening the bleed screws and squeezing the<br />
hoses to bleed out the trapped air. In the<br />
worst case, the system will have to be at least<br />
partially drained (this time, the coolant can be<br />
saved for re-use) and flushed to clear the<br />
problem.


