

Bravo & Brava • 1995 To 2000
Bravo & Brava • 1995 To 2000
Bravo & Brava • 1995 To 2000

You also want an ePaper? Increase the reach of your titles
YUMPU automatically turns print PDFs into web optimized ePapers that Google loves.
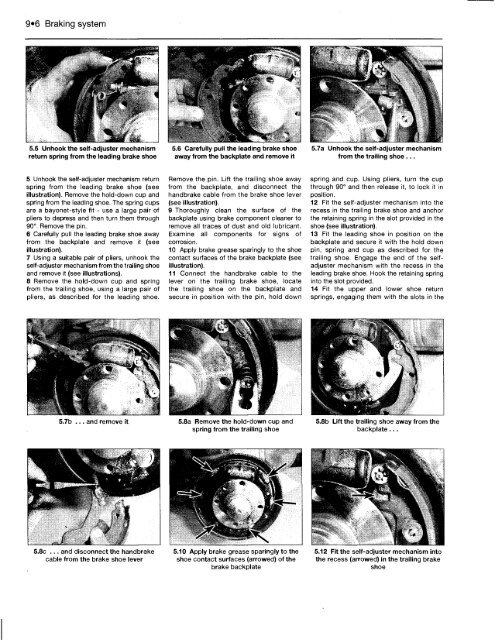
9*6 Braking system<br />
5 Unhook the self-adjuster mechanism return<br />
spring from the leading brake shoe {see<br />
illustration). Remove the hold-down cup and<br />
spring from the leading shoe. The spring cups<br />
are a bayonet-style fit - use a large pair of<br />
pliers to depress and then turn them through<br />
90°. Remove the pin.<br />
6 Carefully pull the leading brake shoe away<br />
from the backplate and remove it (see<br />
illustration).<br />
7 Using a suitable pair of pliers, unhook the<br />
self-adjuster mechanism from the trailing shoe<br />
and remove it (see illustrations).<br />
8 Remove the hold-down cup and spring<br />
from the trailing shoe, using a large pair of<br />
pliers, as described for the leading shoe.<br />
5.7b ... and remove it<br />
Remove the pin. Lift the trailing shoe away<br />
from the backplate, and disconnect the<br />
handbrake cable from the brake shoe lever<br />
(see illustration).<br />
9 Thoroughly clean the surface of the<br />
backplate using brake component cleaner to<br />
remove all traces of dust and old lubricant.<br />
Examine all components for signs of<br />
corrosion.<br />
10 Apply brake grease sparingly to the shoe<br />
contact surfaces of the brake backplate (see<br />
illustration).<br />
11 Connect the handbrake cable to the<br />
lever on the trailing brake shoe, locate<br />
the trailing shoe on the backplate and<br />
secure in position with the pin, hold down<br />
5.8a Remove the hold-down cup and<br />
spring from the trailing shoe<br />
spring and cup. Using pliers, turn the cup<br />
through 90° and then release it, to lock it in<br />
position.<br />
12 Fit the self-adjuster mechanism into the<br />
recess in the trailing brake shoe and anchor<br />
the retaining spring in the slot provided in the<br />
shoe (see illustration).<br />
13 Fit the leading shoe in position on the<br />
backplate and secure it with the hold down<br />
pin, spring and cup as described for the<br />
trailing shoe. Engage the end of the selfadjuster<br />
mechanism with the recess in the<br />
leading brake shoe. Hook the retaining spring<br />
into the slot provided.<br />
14 Fit the upper and lower shoe return<br />
springs, engaging them with the slots in the<br />
5.8b Lift the trailing shoe away from the<br />
backplate...<br />
5.8c ... and disconnect the handbrake 5.10 Apply brake grease sparingly to the 5.12 Fit the self-adjuster mechanism into<br />
cable from the brake shoe lever shoe contact surfaces (arrowed) of the the recess (arrowed) in the trailing brake<br />
brake backplate shoe


